Okta – Adding Custom Attribute
With customer having different attributes for their employees, Okta allows you to create custom attribute to support your organization deployment. Below the steps to add a new Okta custom attribute.
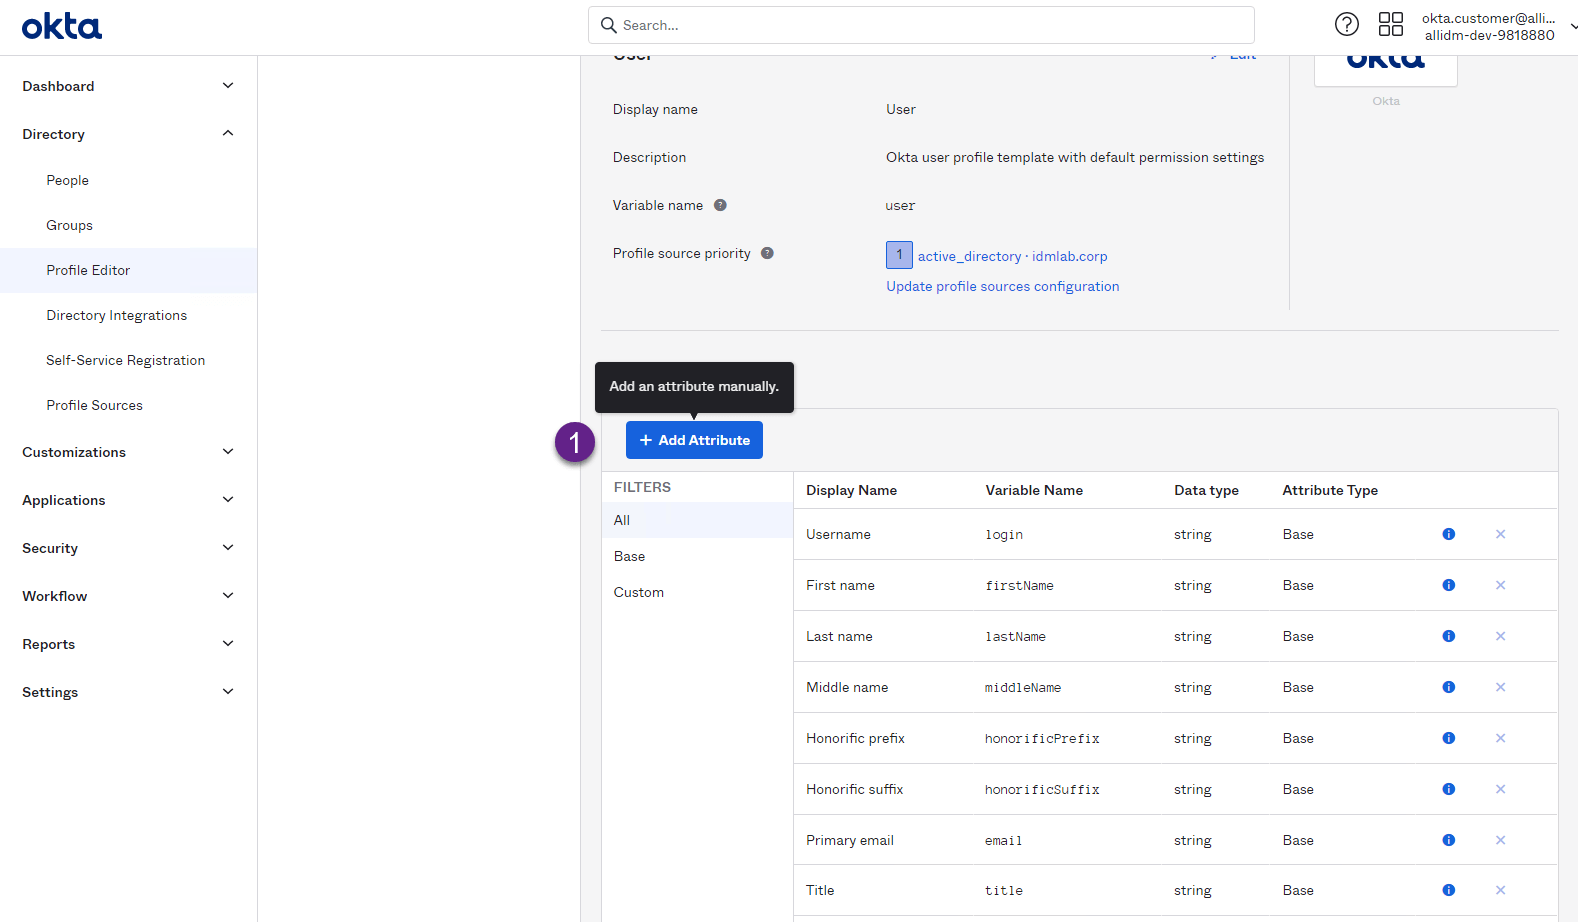
- Open your Okta tenanat and select the Profile Editor and select All Okta.

2. Click the Add Attribute button
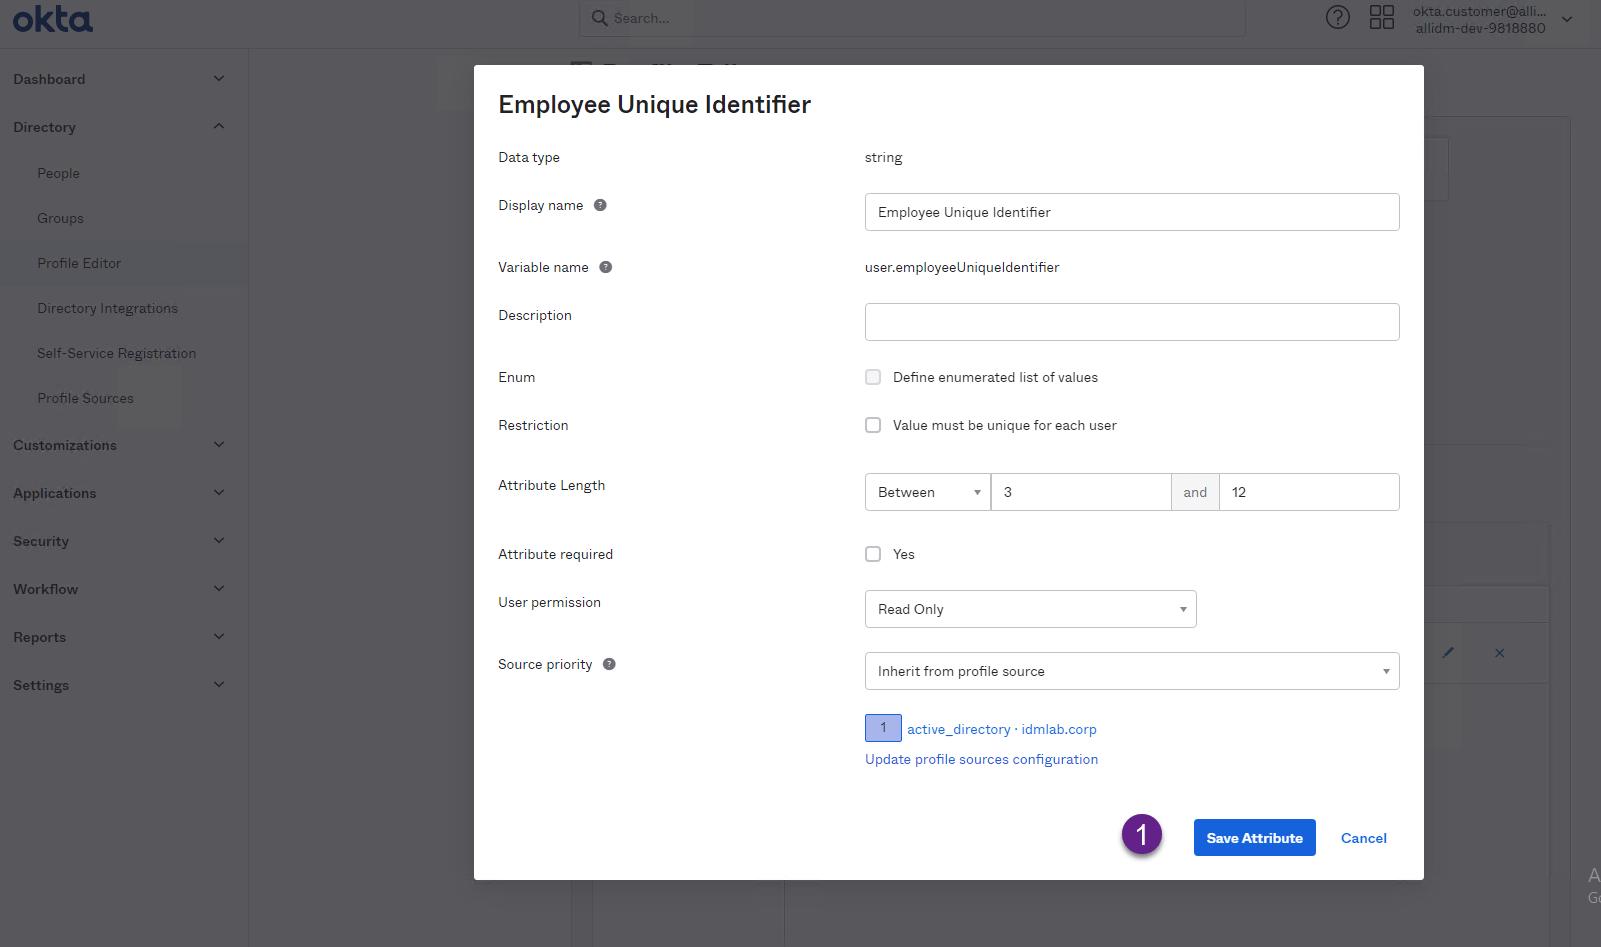
3. Complete the required information in the Add Attribute screen, for this post we are creating a new attribute called employeeUniqueIdentifier , once completed click the Save button.

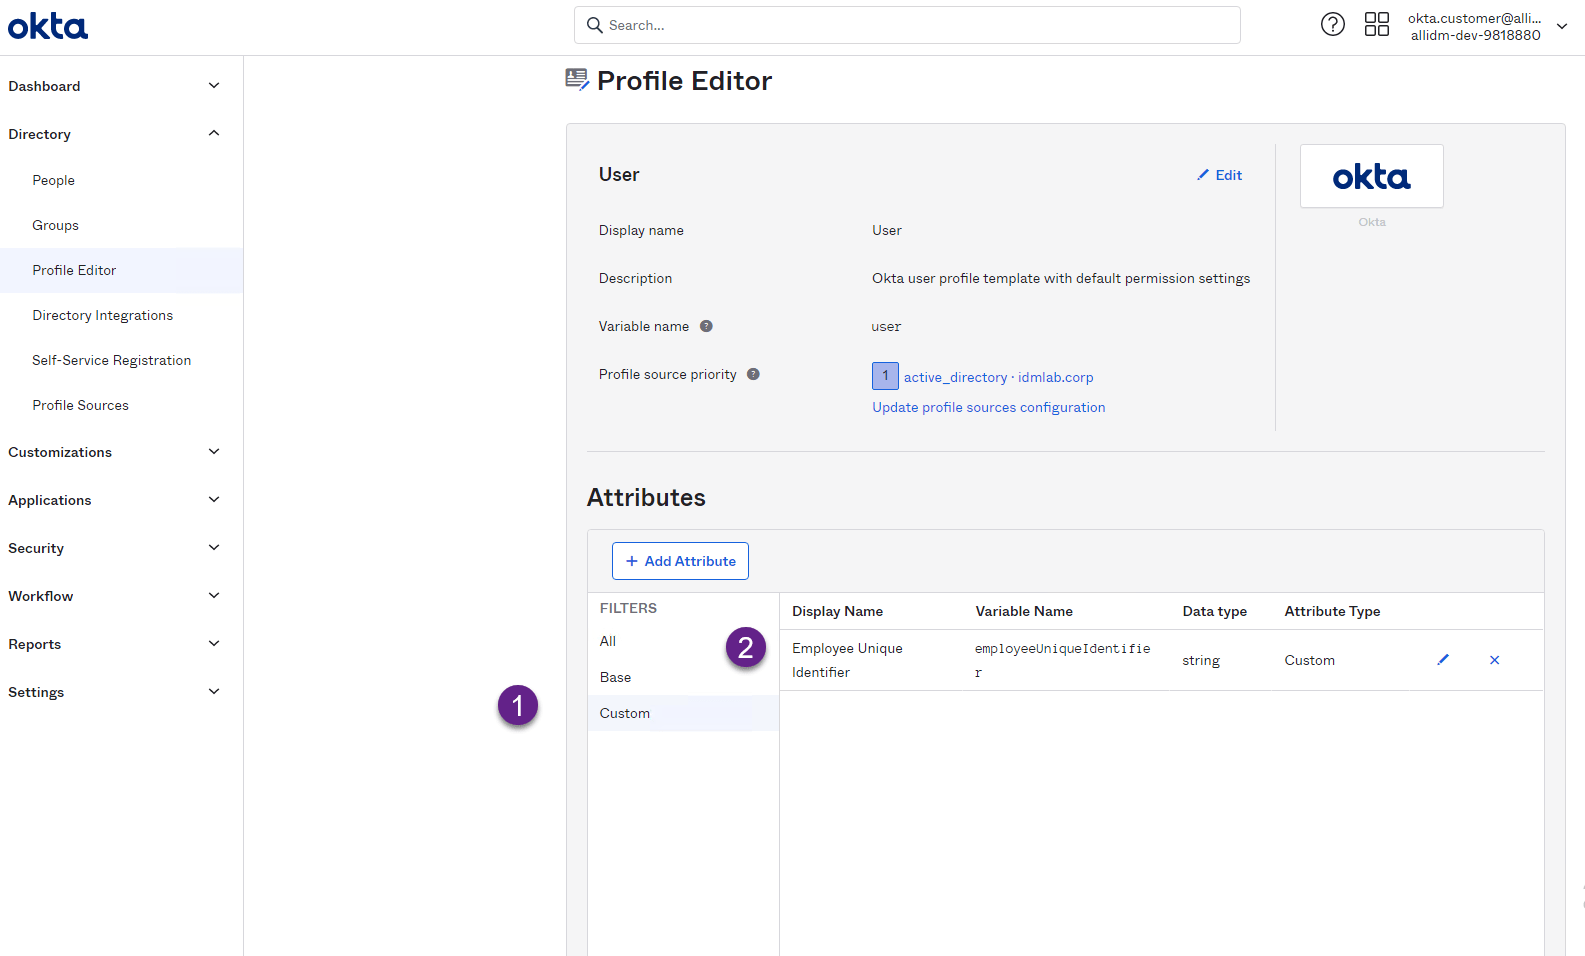
4. Now the new Okta attribute was added into the Okta universal directory. You can confirm clicking again the Profile Editor and Select Okta application, Click the Custom tab and the new attribute is displayed.
5. You can double click the Okta attribute and you will see the new Okta attribute definition.
Keep visiting us for more quick Okta reviews.
Gabriel Magarino
Gabriel Magarino – Senior Security Manager | IAM Evangelist - Experienced leader with over 20 years in the IT and cybersecurity industry, specializing in Identity & Access Management. Expert in Okta, One Identity, SailPoint (IdentityIQ & IdentityNow), OneLogin, Delinea, and CyberArk. Passionate about exploring IAM and emerging technologies, coaching, and training IAM teams. Holds a Master’s in Computer Science and multiple certifications, including Okta Professional & Administration, One Identity Architect & Instructor, SailPoint Identity Now, ITIL, Scrum Master, among others. Currently pursuing a PhD with a focus on Computer Science and Artificial Intelligence.