One Identity Manager is a powerful provisioning solution. One Identity Manager is typically deployed as an on-premises solution, although there may also be options for hybrid or cloud-based deployments.
Below are the steps required to create an Identity within One Identity Manager. Identity in this product is stored in a table called Person.
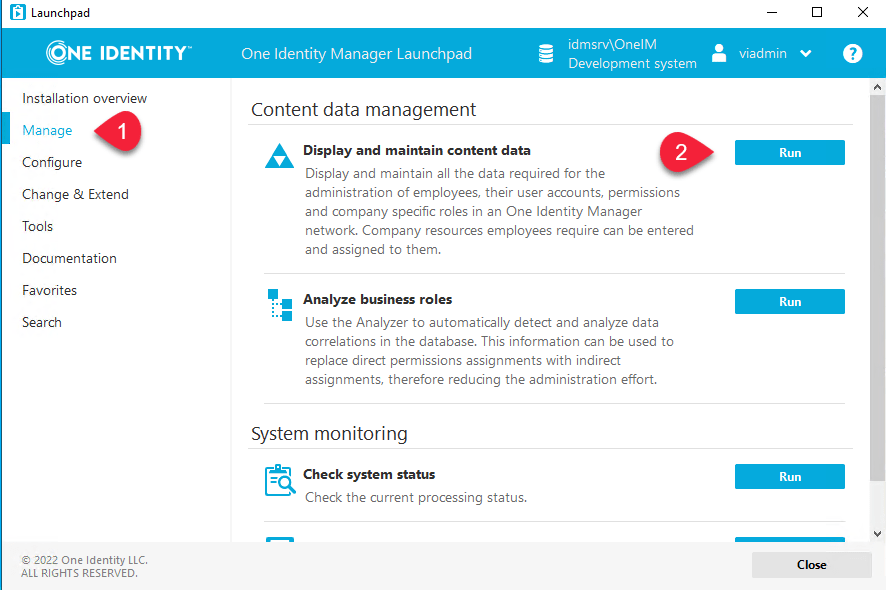
- Open LaunchPad > Manage > Click run over the Display and maintain content data.
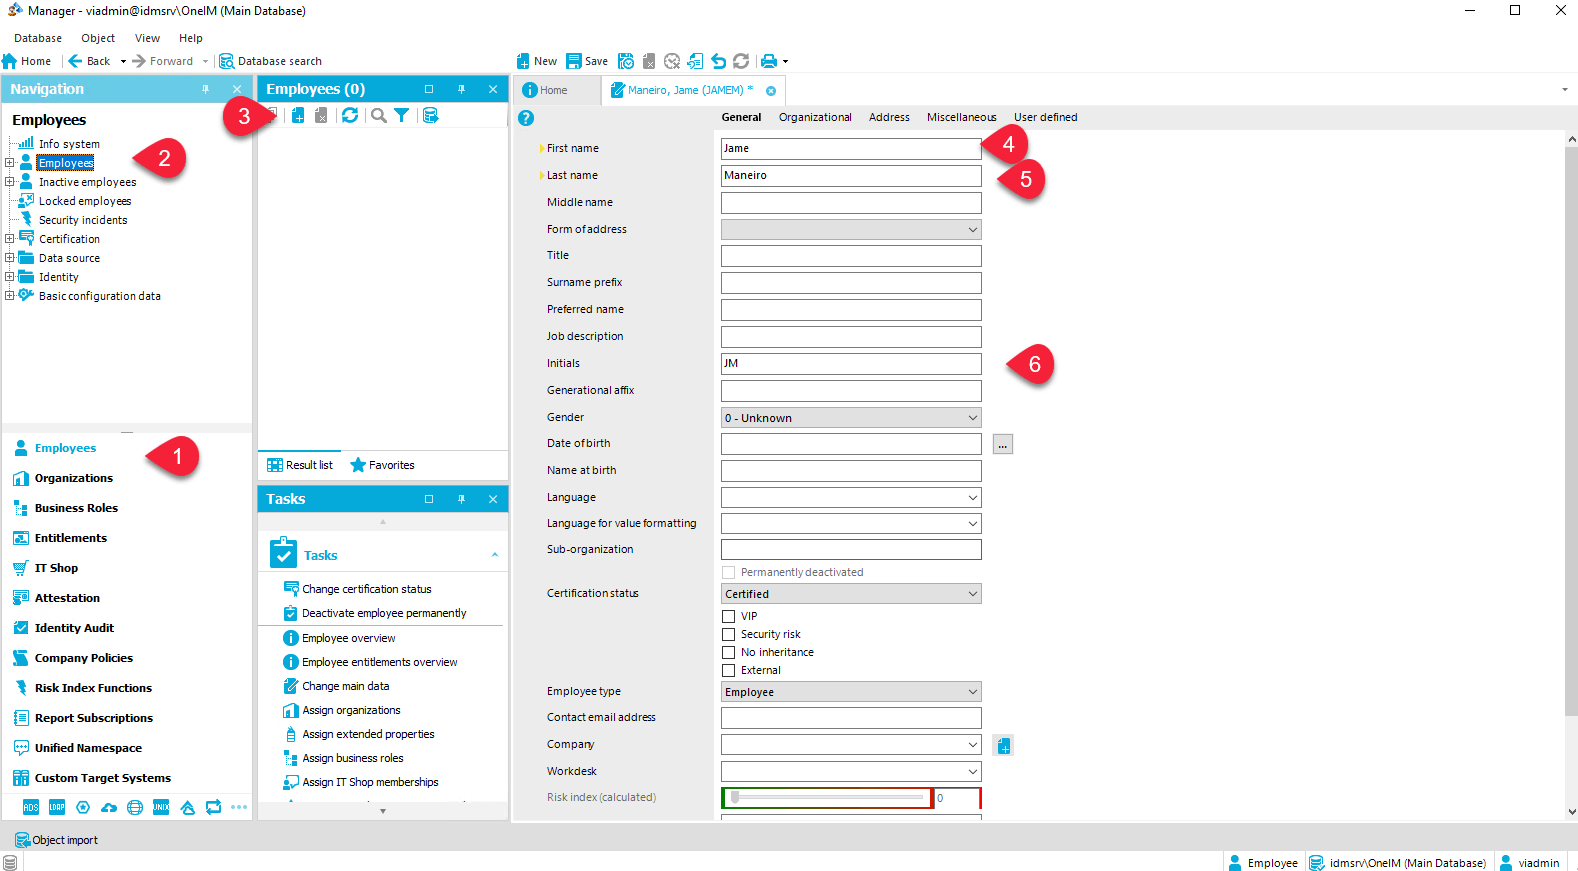
2. One Identity Manager (OneIM) will open the Manager Tool
3. Click Employees > Employee > Click Add icon (+)
4. The minimum required fields to create an Identity within OneIM are First name & Lastname.
5. Populate Firstname & Lastname. Once Completed, OneIM generates automatically the Initials, this is a default behavior in the OneIM product. Once Completed click the Save button.
6. Once OneIM saved the Identity (remember stored in the Person Table), OneIM automatically calculated/generated the Central account. The central account is typically the same value you will use in other target systems like Active Directory (SamAccountName).
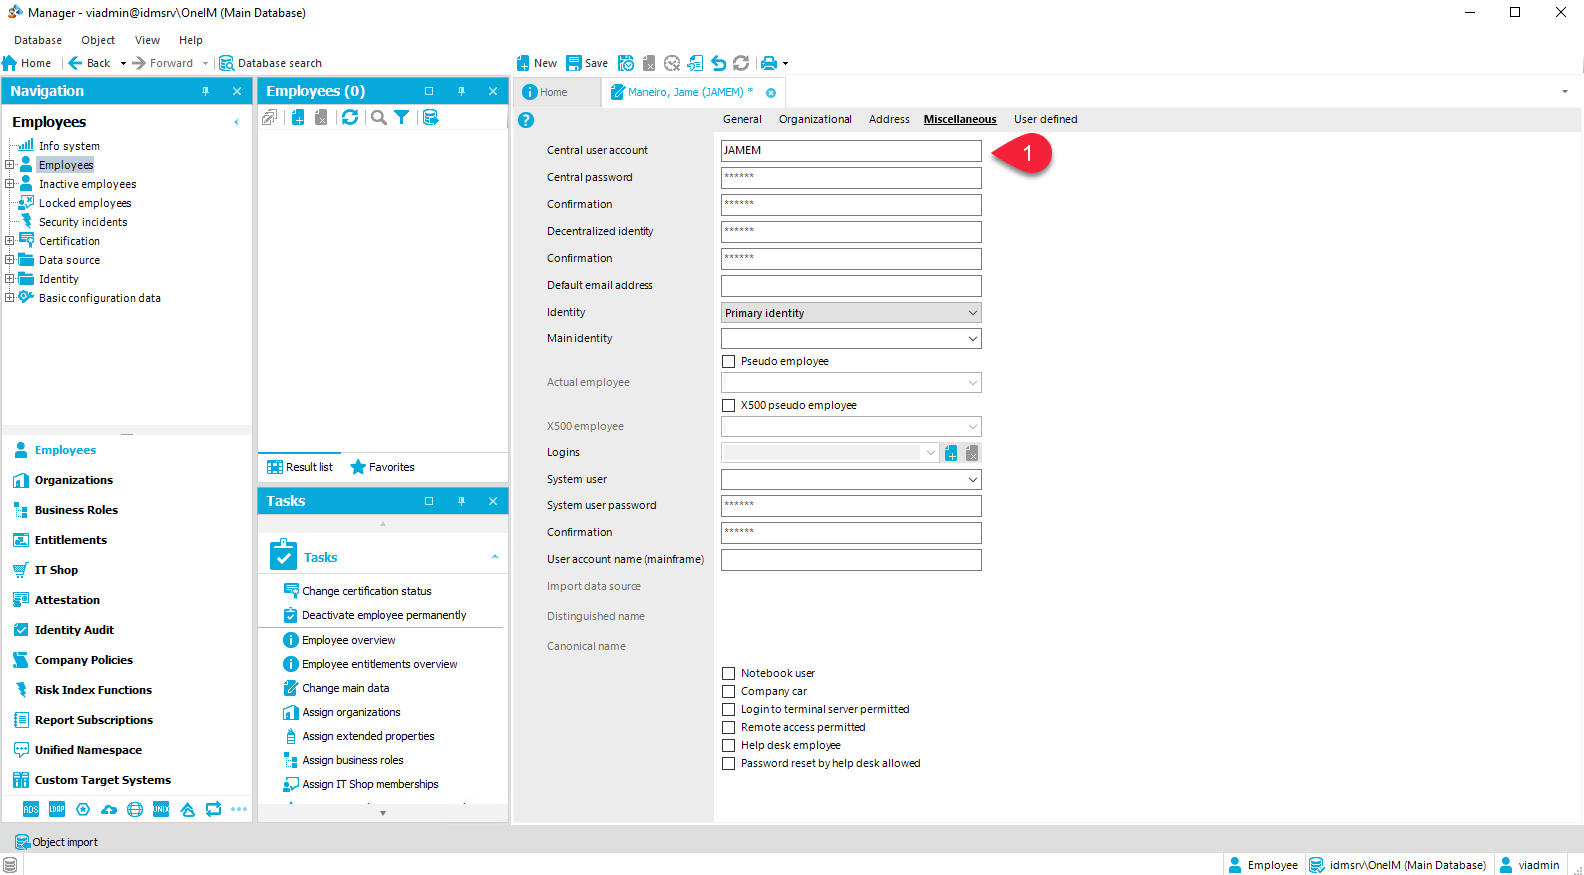
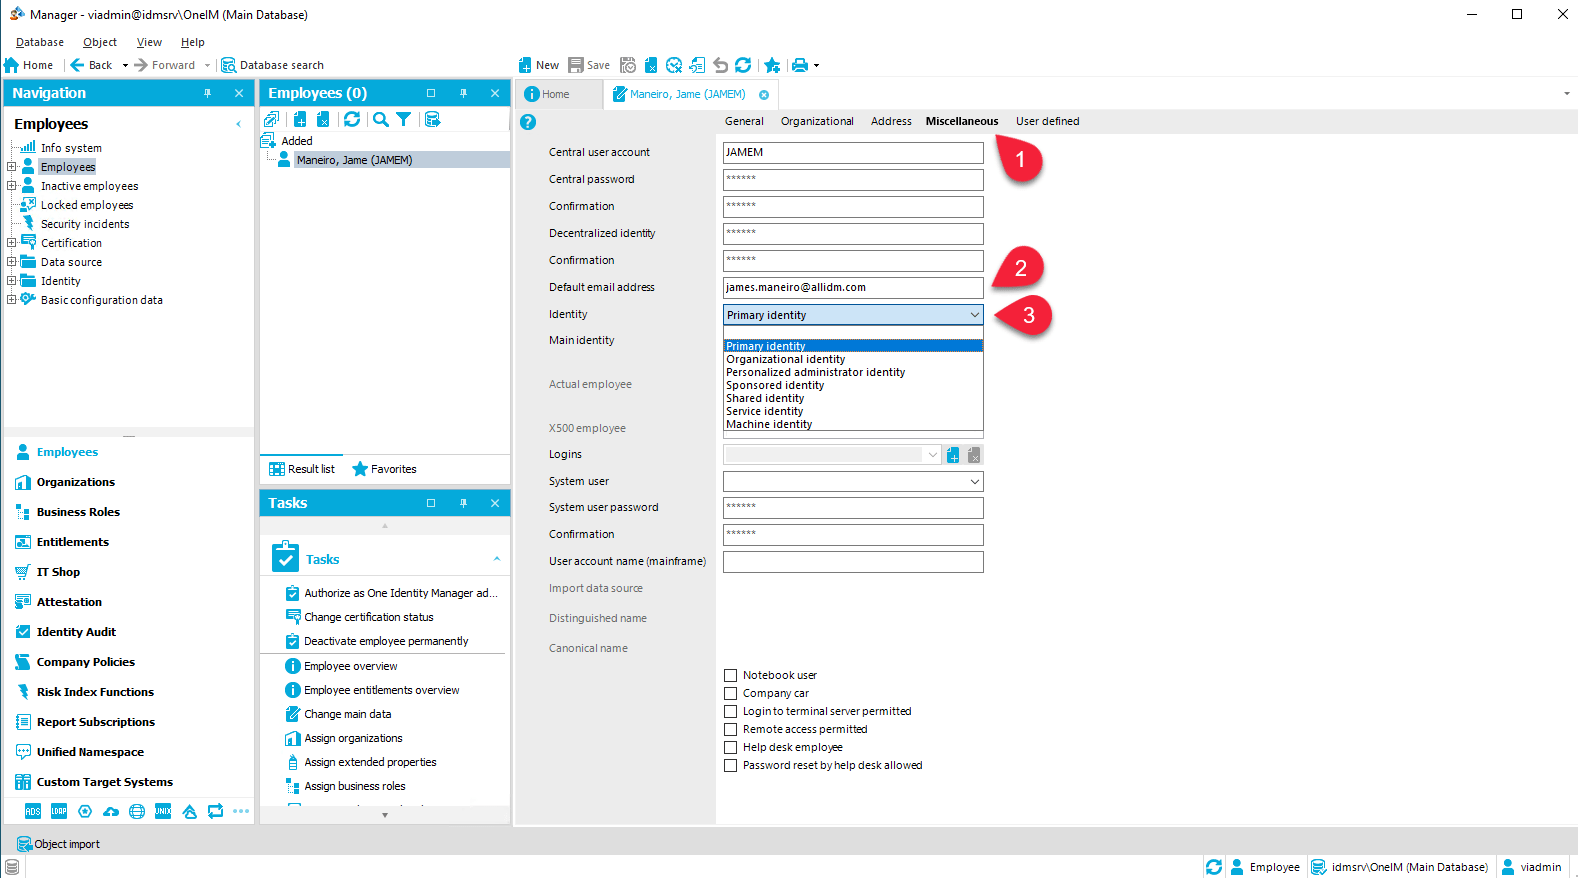
7. OneIM employee has multiple tabs, if you click the Miscellaneous tab, you will see the Default email address attribute that you can populate. Notice there is an Identity attribute that is used to identify the employee identity type. By default Primary Identity is selected.
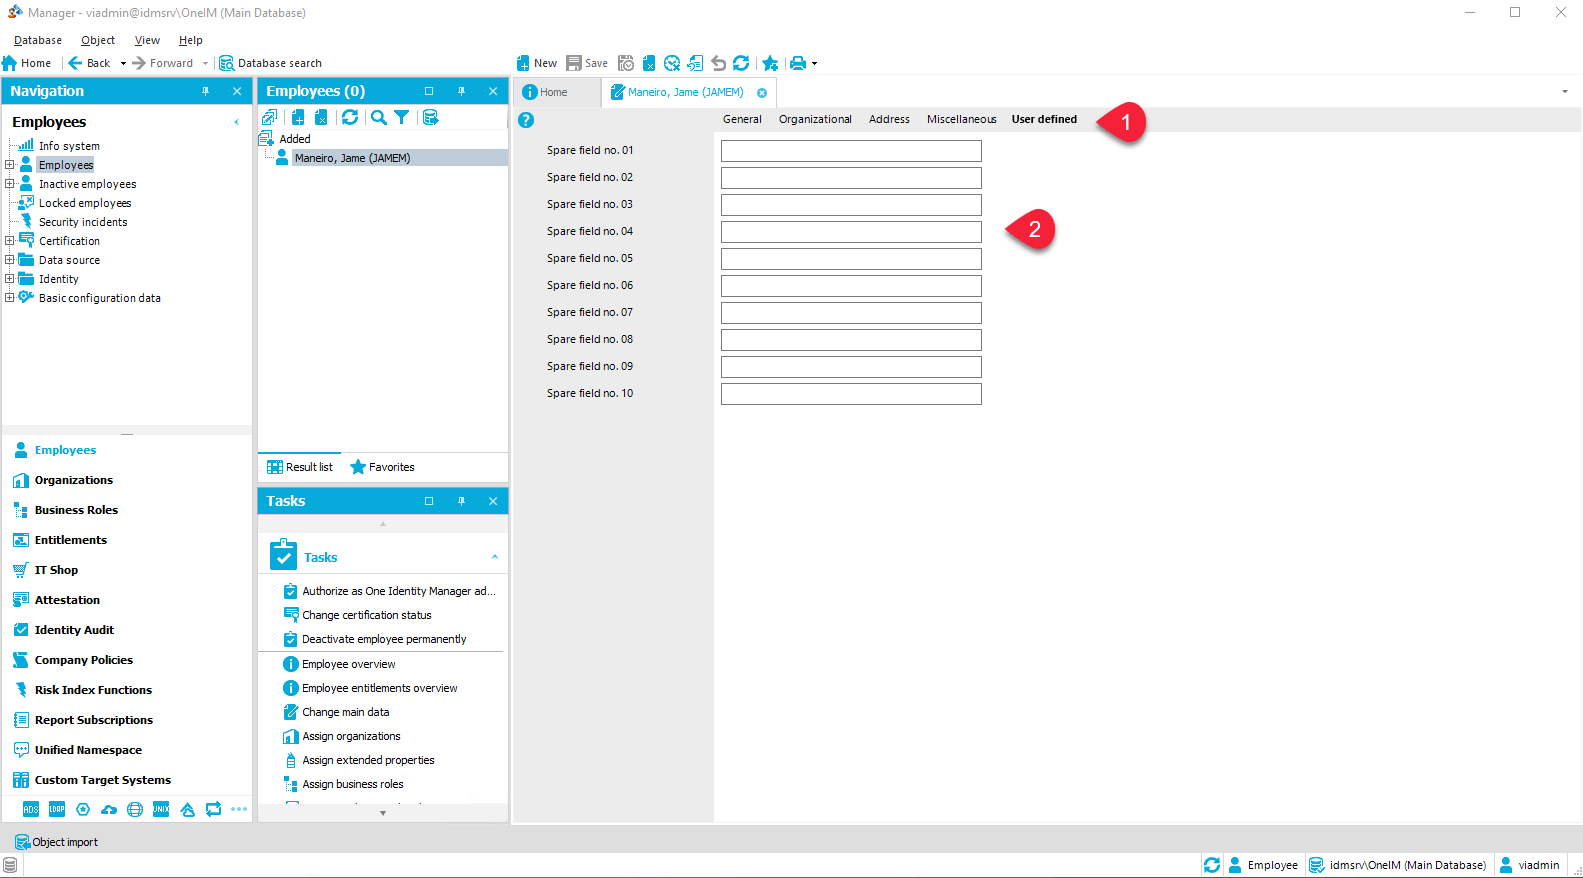
8. OneIM provides base attributes. Depending on your organization’s use cases, if any of those attributes don’t fit your requirements, OneIM by default provides 10 spare attributes. Click the User Defined Tab to see them.
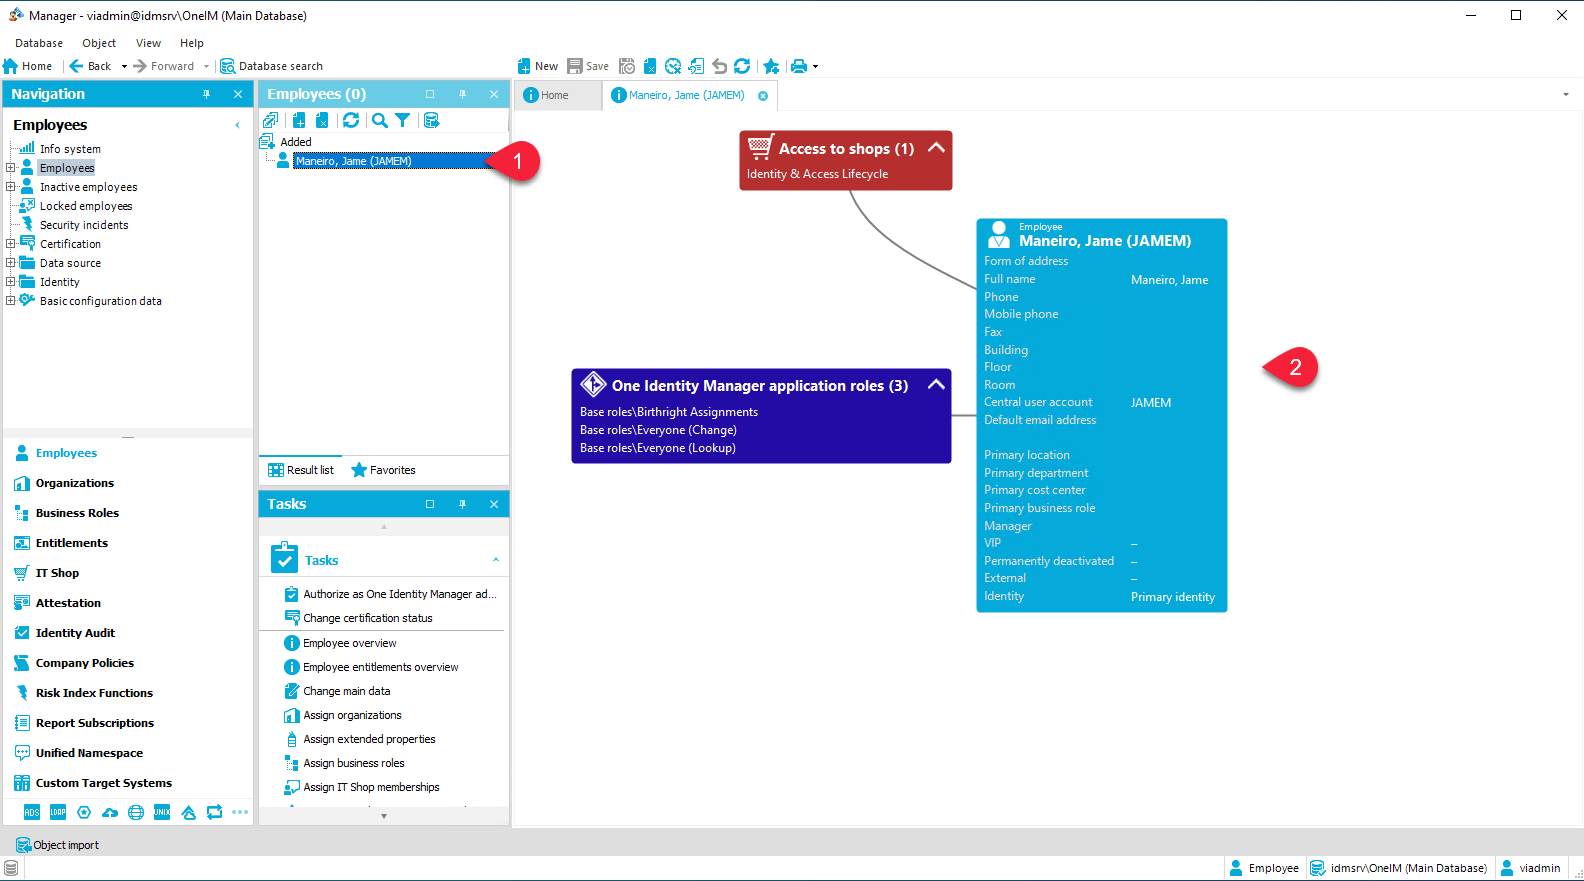
7. OneIM also gives you a HyperView showing the employee information and additional permissions added by default.
Gabriel Magarino
Gabriel Magarino – Senior Security Manager | IAM Evangelist - Experienced leader with over 20 years in the IT and cybersecurity industry, specializing in Identity & Access Management. Expert in Okta, One Identity, SailPoint (IdentityIQ & IdentityNow), OneLogin, Delinea, and CyberArk. Passionate about exploring IAM and emerging technologies, coaching, and training IAM teams. Holds a Master’s in Computer Science and multiple certifications, including Okta Professional & Administration, One Identity Architect & Instructor, SailPoint Identity Now, ITIL, Scrum Master, among others. Currently pursuing a PhD with a focus on Computer Science and Artificial Intelligence.