Sailpoint IdentityIQ – Active Directory Group Aggregation
Continue our previous post where we configure the IdentityIQ and Active Directory connector, now we will show you how to configure the group aggregation into IdentityIQ.
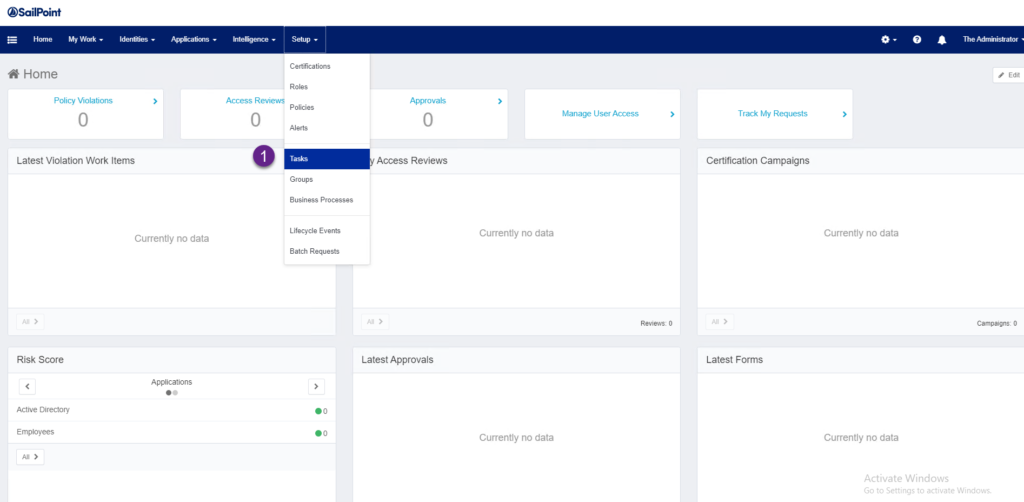
- Go to the Setup > Tasks.
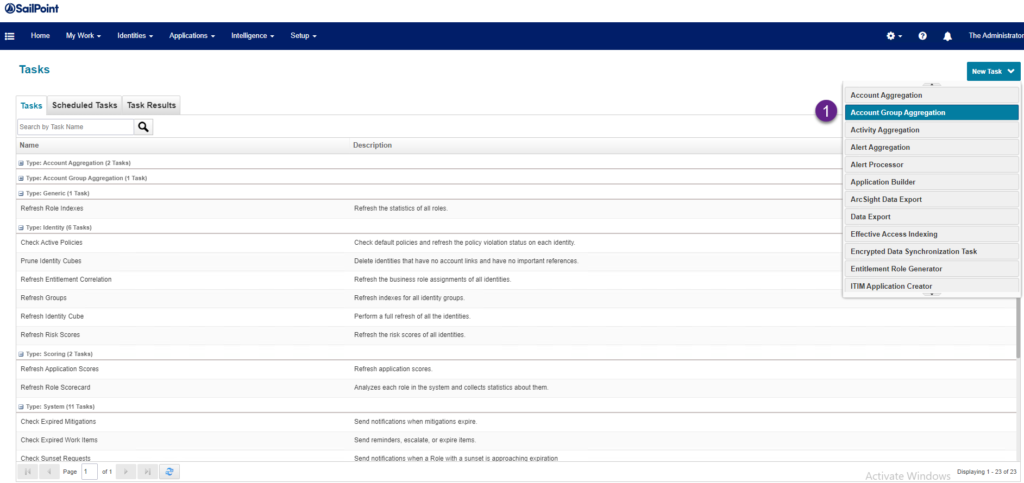
2. Top right click New Task > Account Group Aggregation.
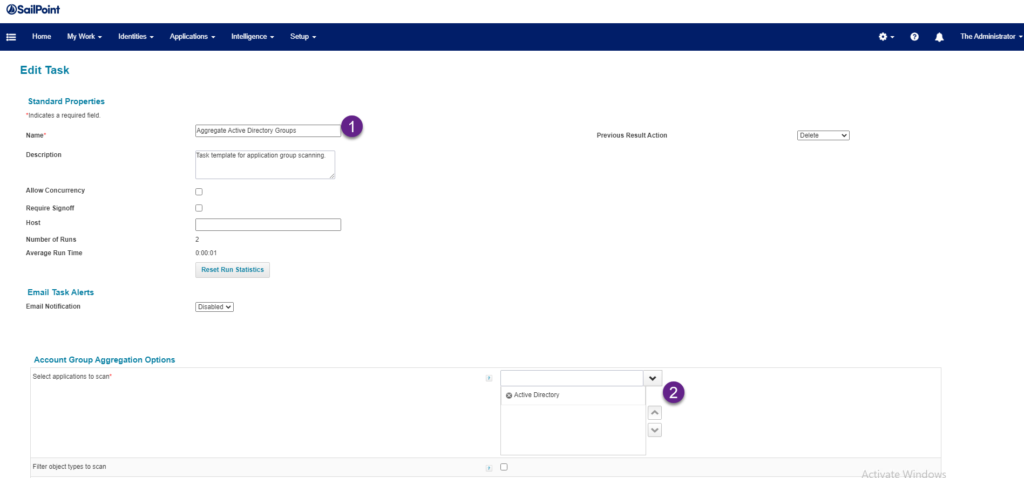
3. Populate the name for the Aggregation and select Active directory from your aggregation options.
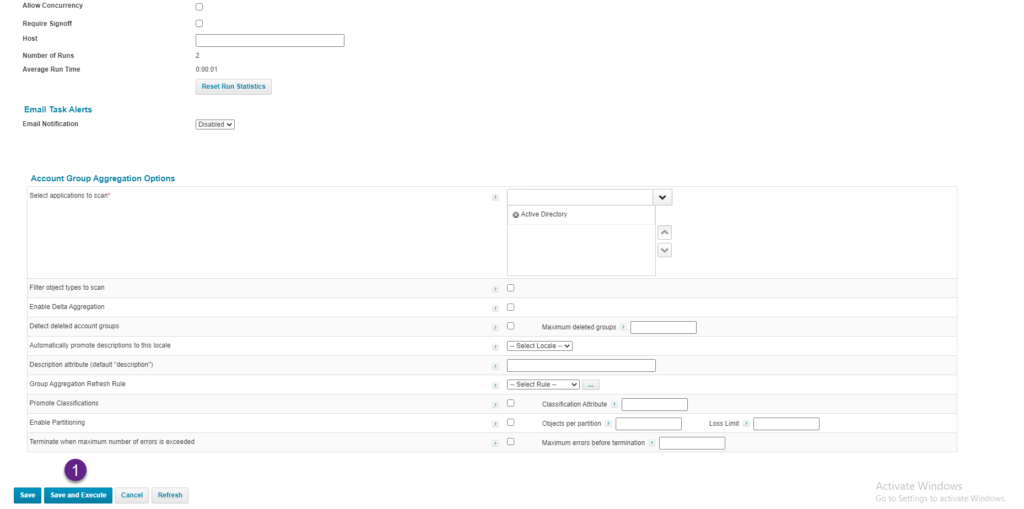
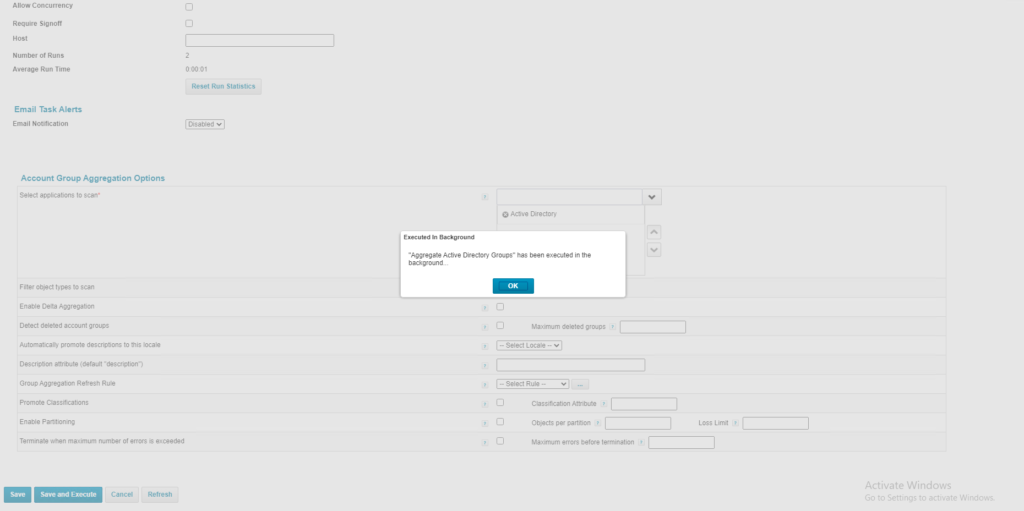
4. Scroll-down and now you click the Save and Execute button.
5. Identity start the Active Directory Group Aggregation in the back-end.
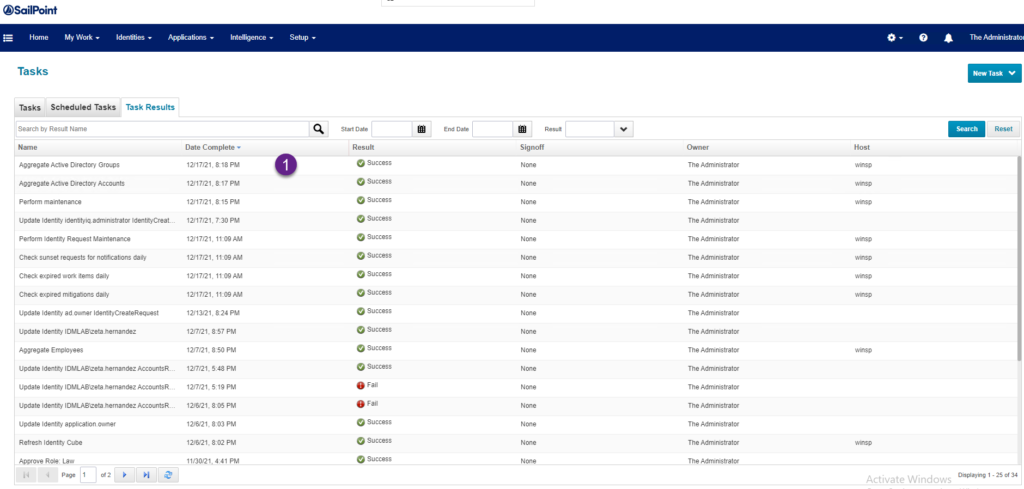
6. Click the Task Results to verify the previous aggregation group was run.
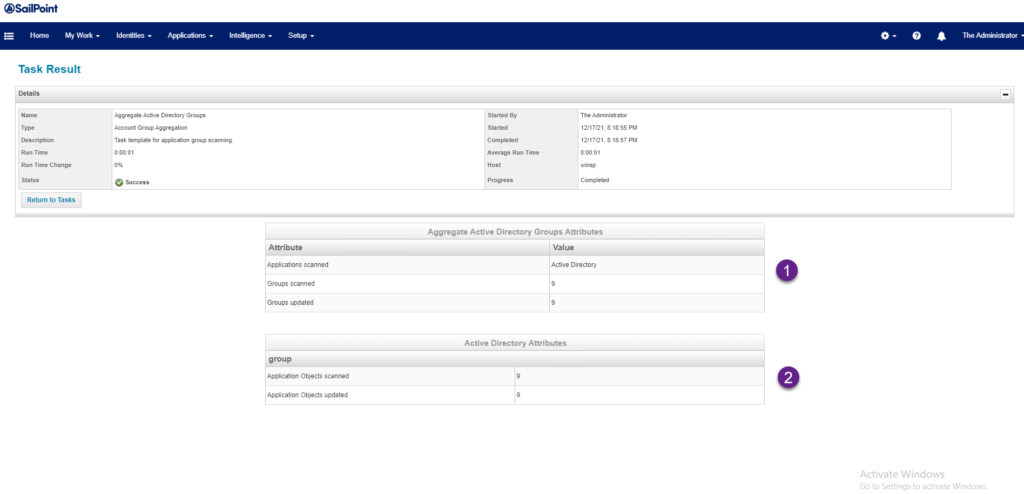
6. Task result for the aggregation show you the Groups Scanned and additional information for the Group Aggregation.
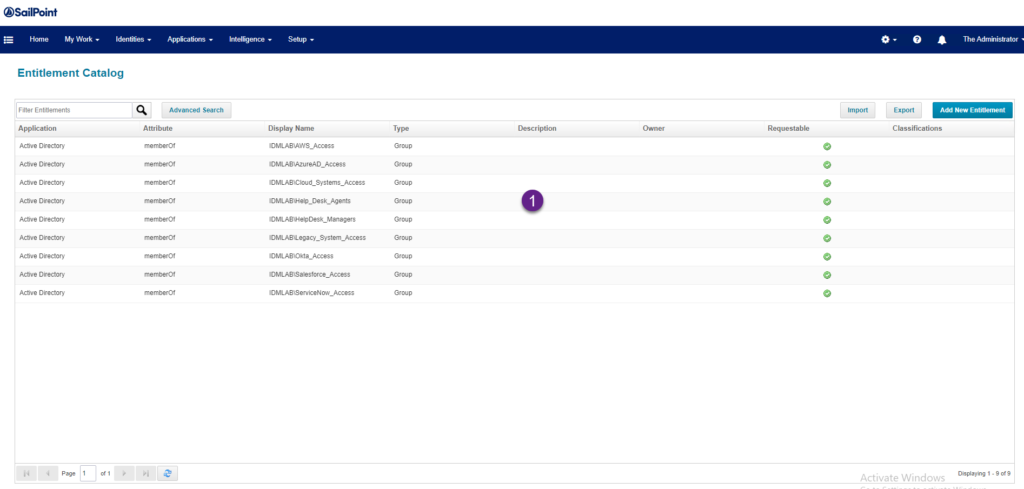
7. You can verify the groups were added as Entitlement selecting Applications > Entitlement Catalog
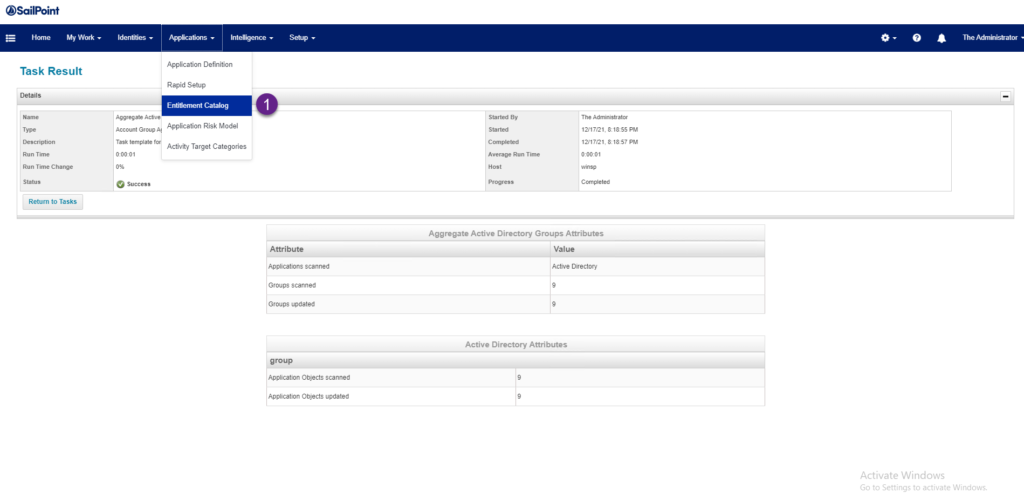
8. The entitlement catalog show the AD groups added.
Read more about Sailpoint IdentityIQ.
Keep visiting us for more quick IdentityIQ reviews.
