Sailpoint IdentityIQ – Configure Delimited File (CSV) Connector
Using a CSV connector is a common activity among any identity management solution, on this post you will configure the Delimited File connector within Sailpoint IdentityIQ.
We will use the following sample file to import into IdentityIQ and create identities.

- Go to Applications > Application Definition > Click Add New Application.
- IdentityIQ display the Edit Application form. From the Application Type select DelimitedFile

3. On the screen populate the name, owner and select Authorization Application.

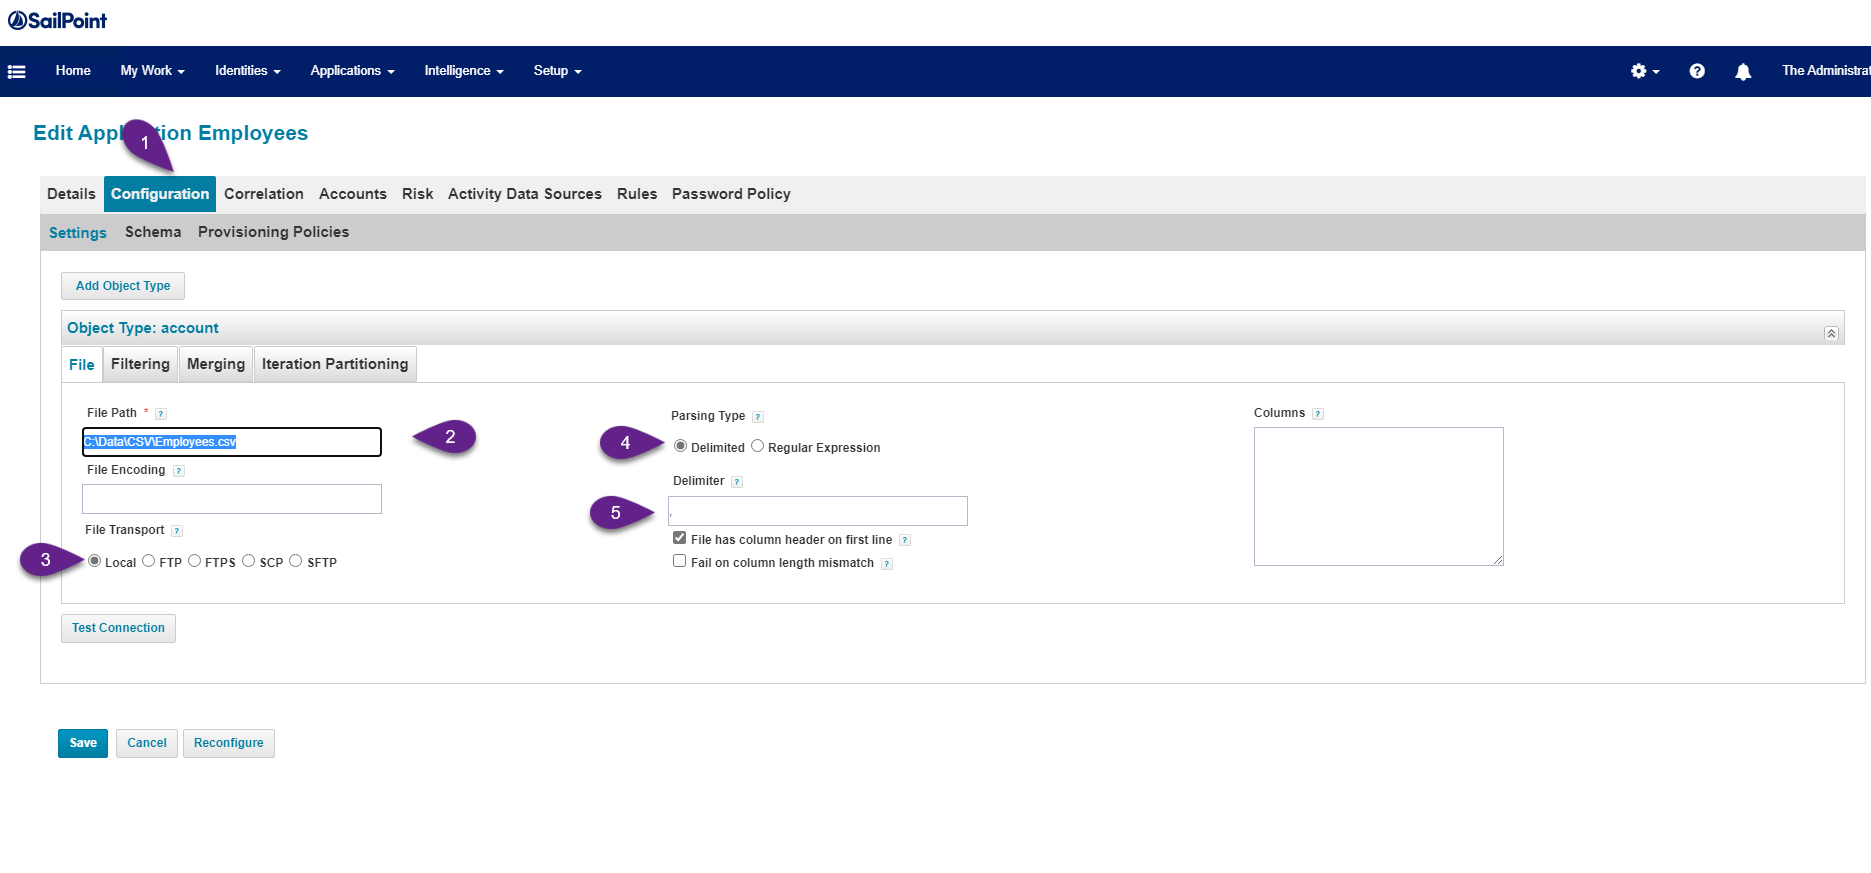
4. Click Configuration tab and select file transport, file path, parsing type and delimiter.
5. Click Schema tab and scroll-down. From there click the Discovery Schema Attributes. That will load the csv file schema into the IdentityIQ.

6. Scroll-up and complete the configuration adding the Identity Attribute and Display Attribute.

7. At this point you can scroll-down and click the Preview button. This will display some sample of the data matching the defined schema. Click the Save button and now the connector is ready to import data.

8. Now you configure an account aggregation for the Employees delimited file previously defined. Run it and you will see the accounts being aggregated into IdentityIQ. The screenshot below shows the file we used to configured with only 2 accounts.

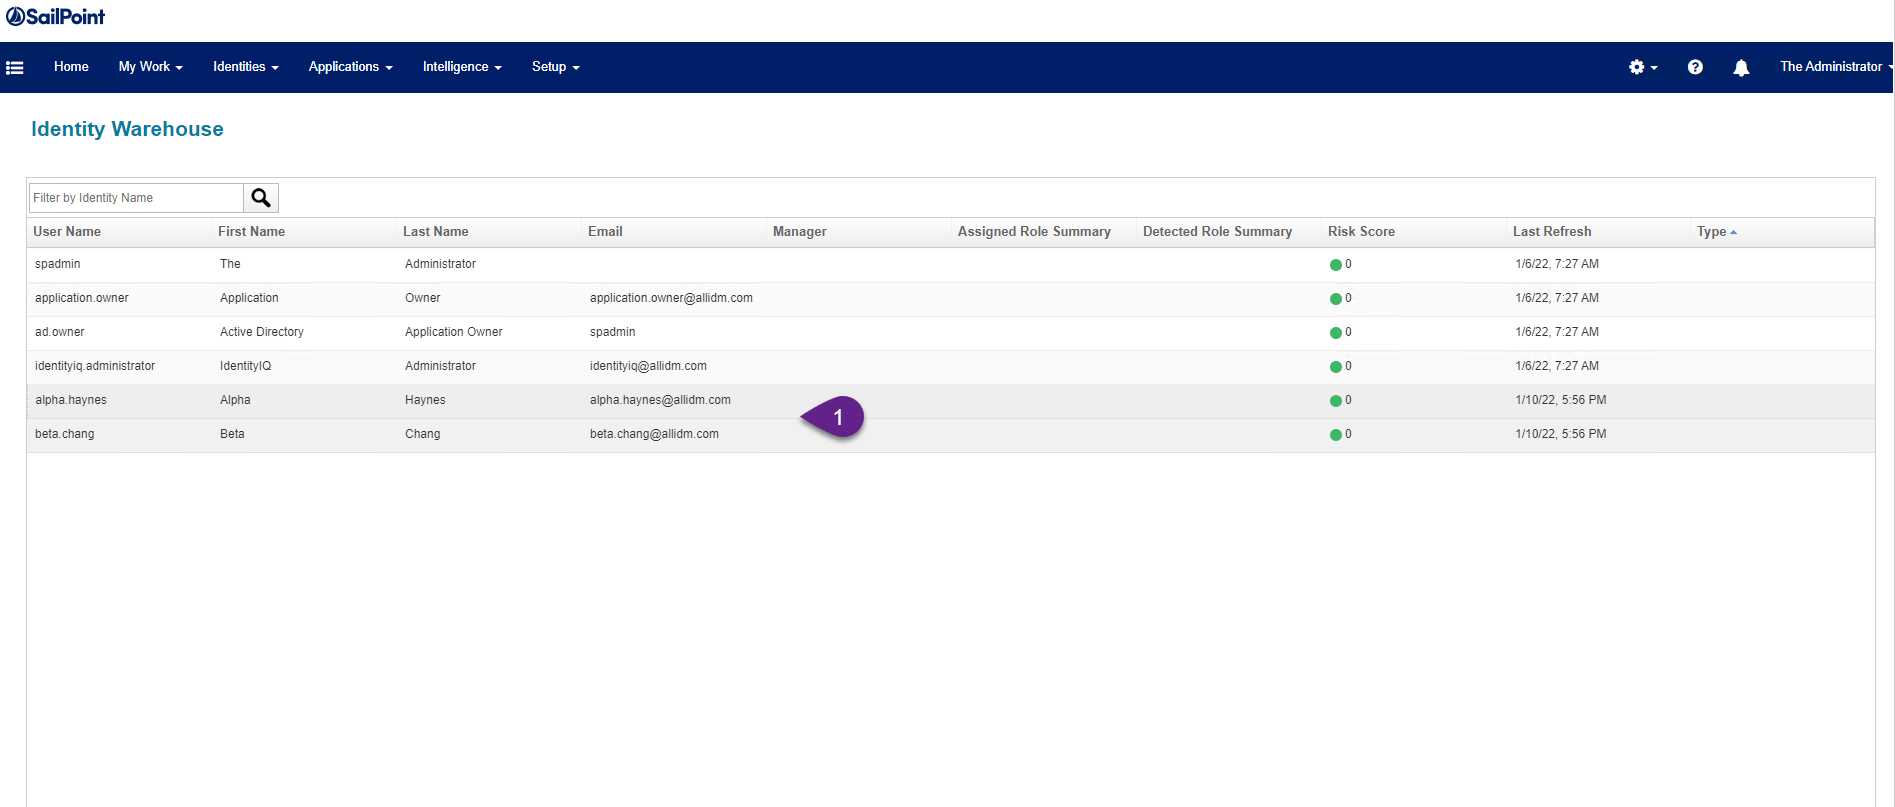
9. Go to Identities > Identity Warehouse and you will see the 2 users from the CSV file now with an identity created.
10. Click on any of those users and additional information is displayed.

11. Click the Application Accounts for the selected user and you will see the Employees application created and all the attributes from the csv file listed.

Keep visiting us for quick reviews about Sailpoint IdentityIQ.
Gabriel Magarino
Gabriel Magariño is a Security Manager, Identity & Access Management Evangelist. He currently leads multiple deployment teams and specializes in One Identity products, and has recently expanded his repertoire to include IdentityIQ & IdentityNow by Sailpoint, Okta & One Login, CyberArk. Gabriel enjoys exploring other products like OpenIDM, OpenAM by ForgeRock, JumpCloud, and many others sharing technical knowledge on this web site. He has a Computer Science Master degree with additional certifications like ITIL, SCRUM, One Identity Architect,IdentityNow,etc.