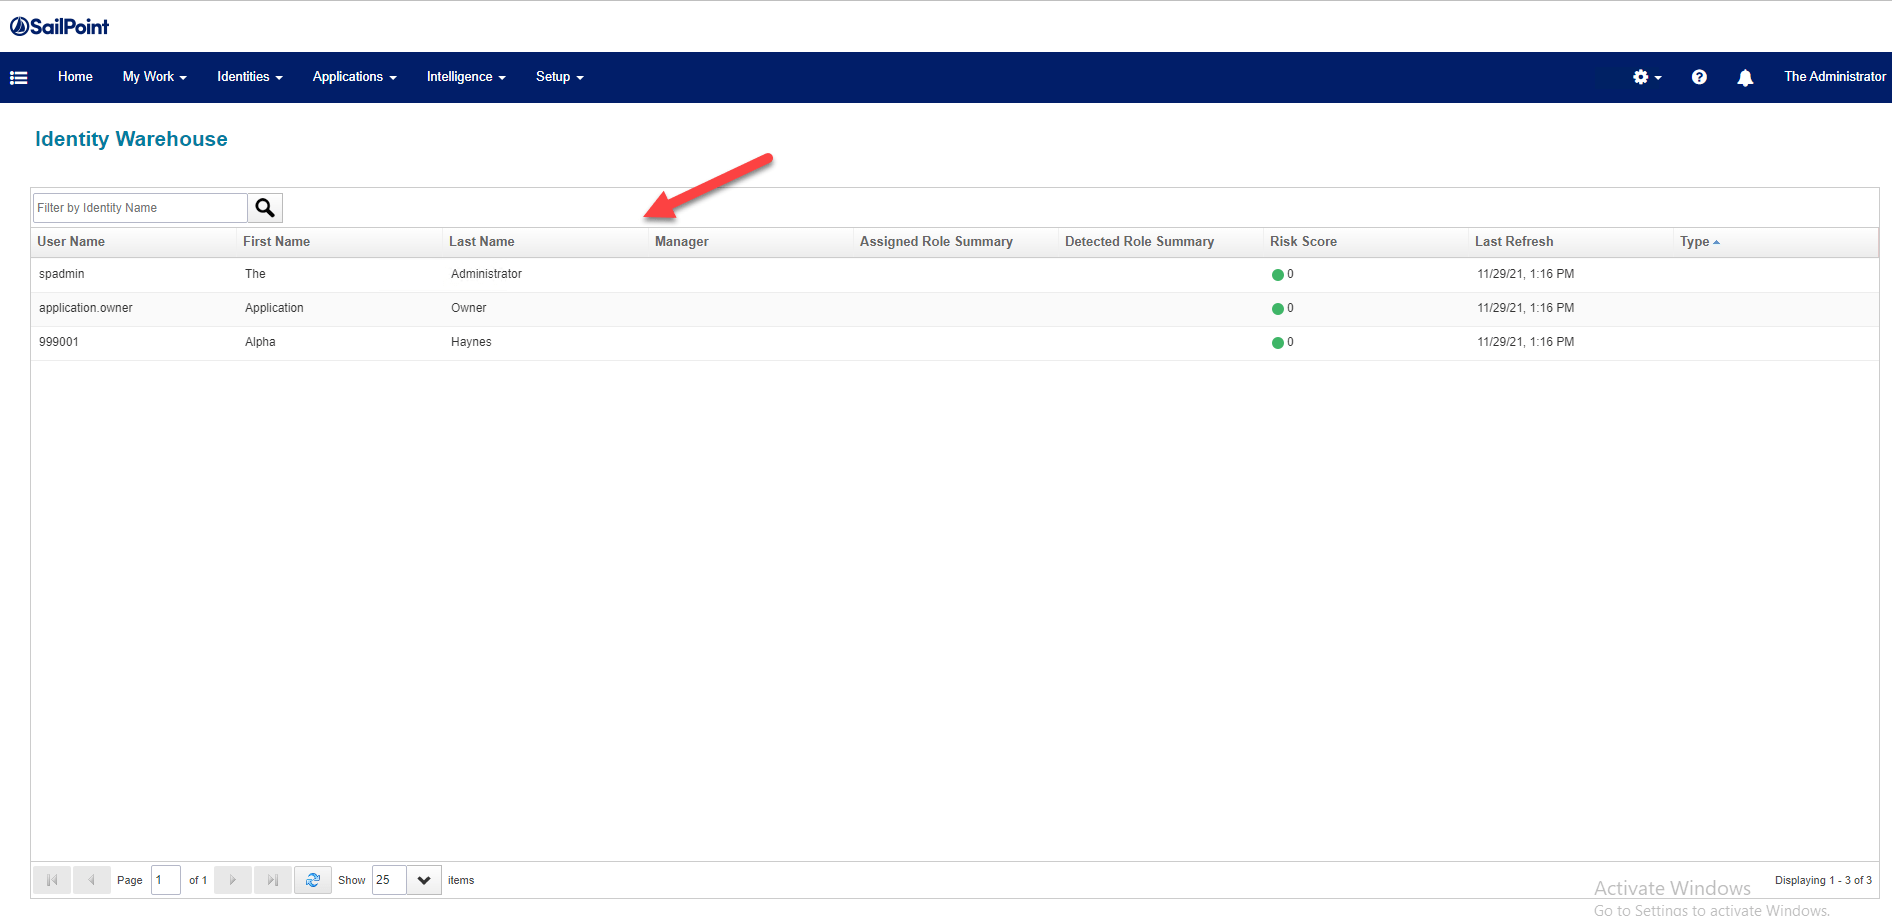
By default IdentityIQ displays certain fields into the Identity Warehouse table. Next steps shows the steps necessary to include the Email attribute in the table.
- Select the Identities > Identity Warehouse, IdentityIQ displays the default layout with the tables. Now we will proceed to incorporate the Email attribute in the table.
2. Go to the debug page http://servername/identityiq/debug/debug.jsf. Once in there select UI Configuration

3. IdentityIQ display the UIConfig xml file containing all the definition for the component.
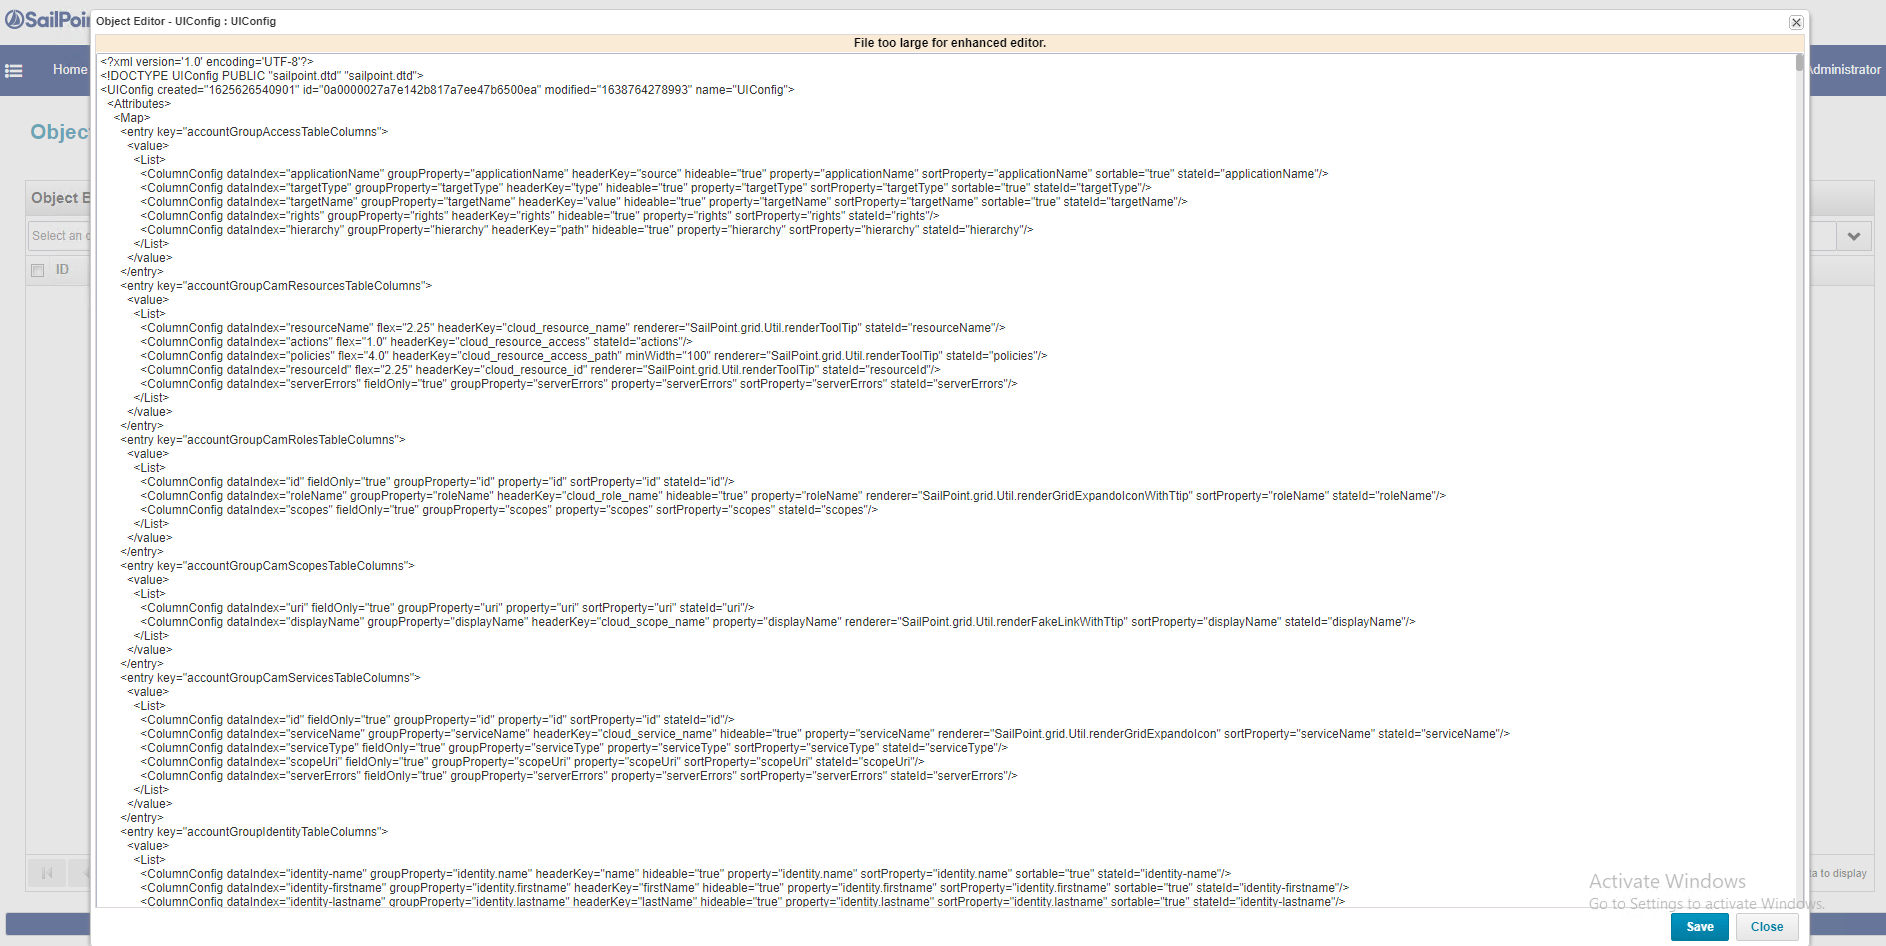
4. In this section search for the string <entry key=”identityTableColumns”> . This section contains the list of fields displayed in the Identity Warehouse table.
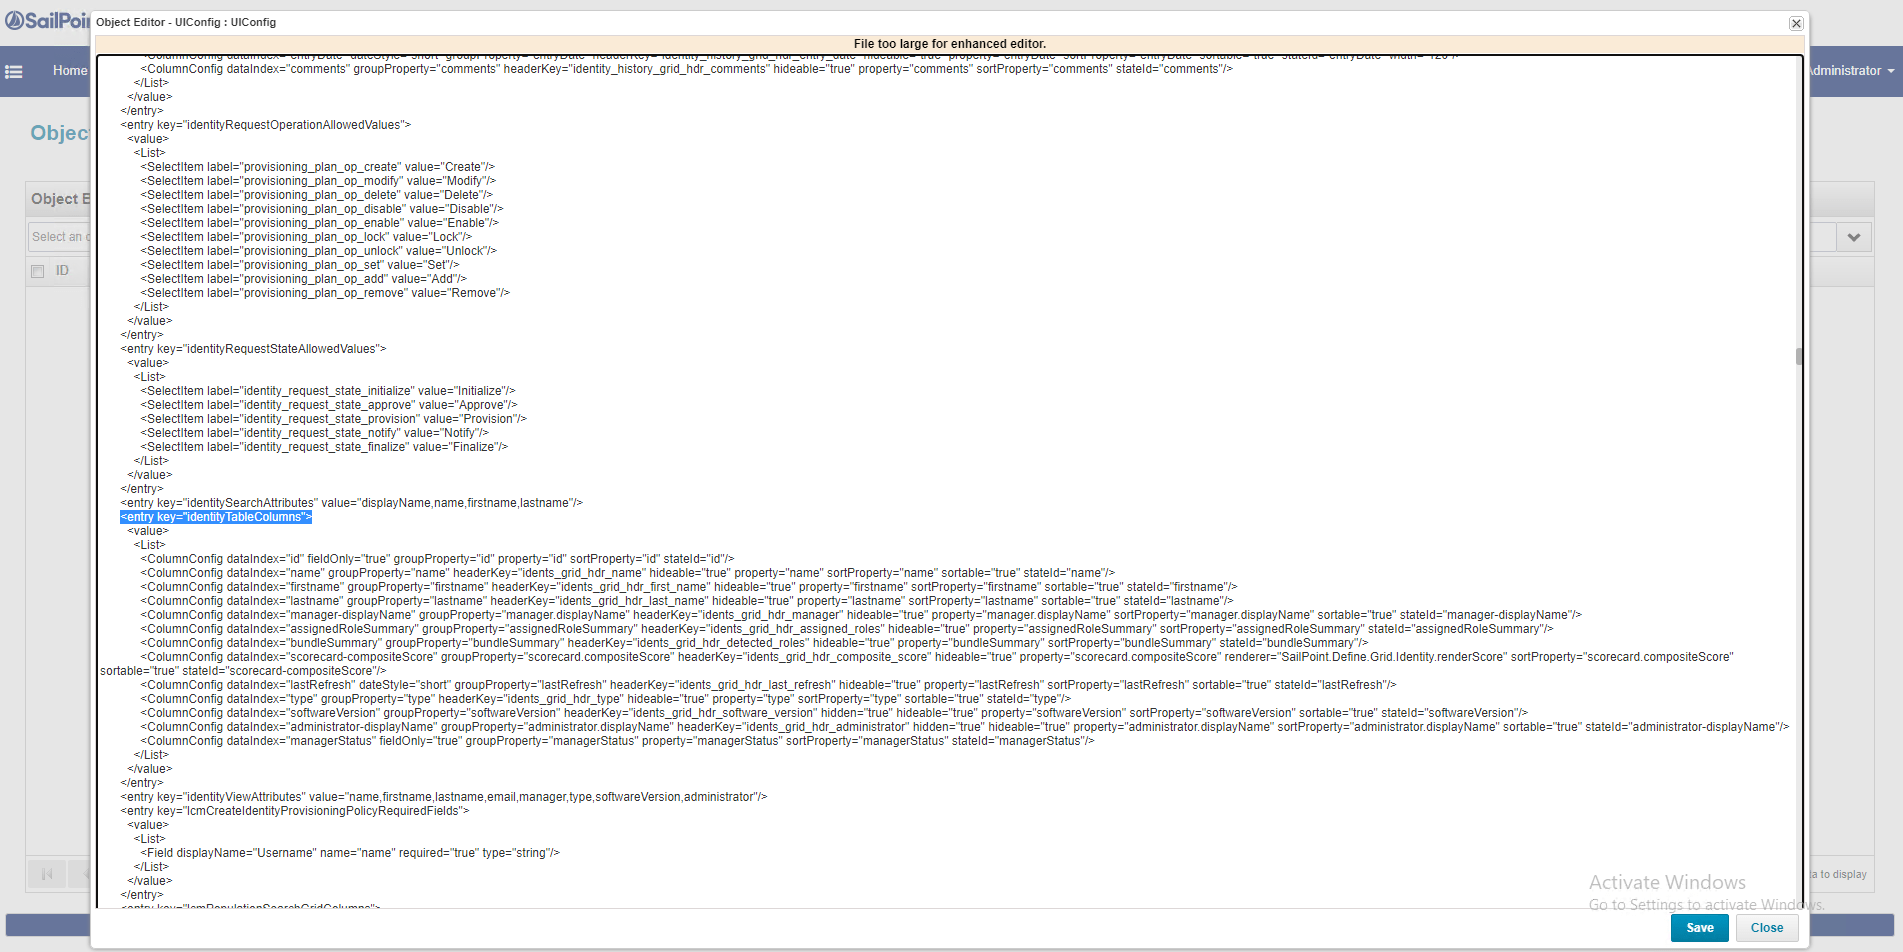
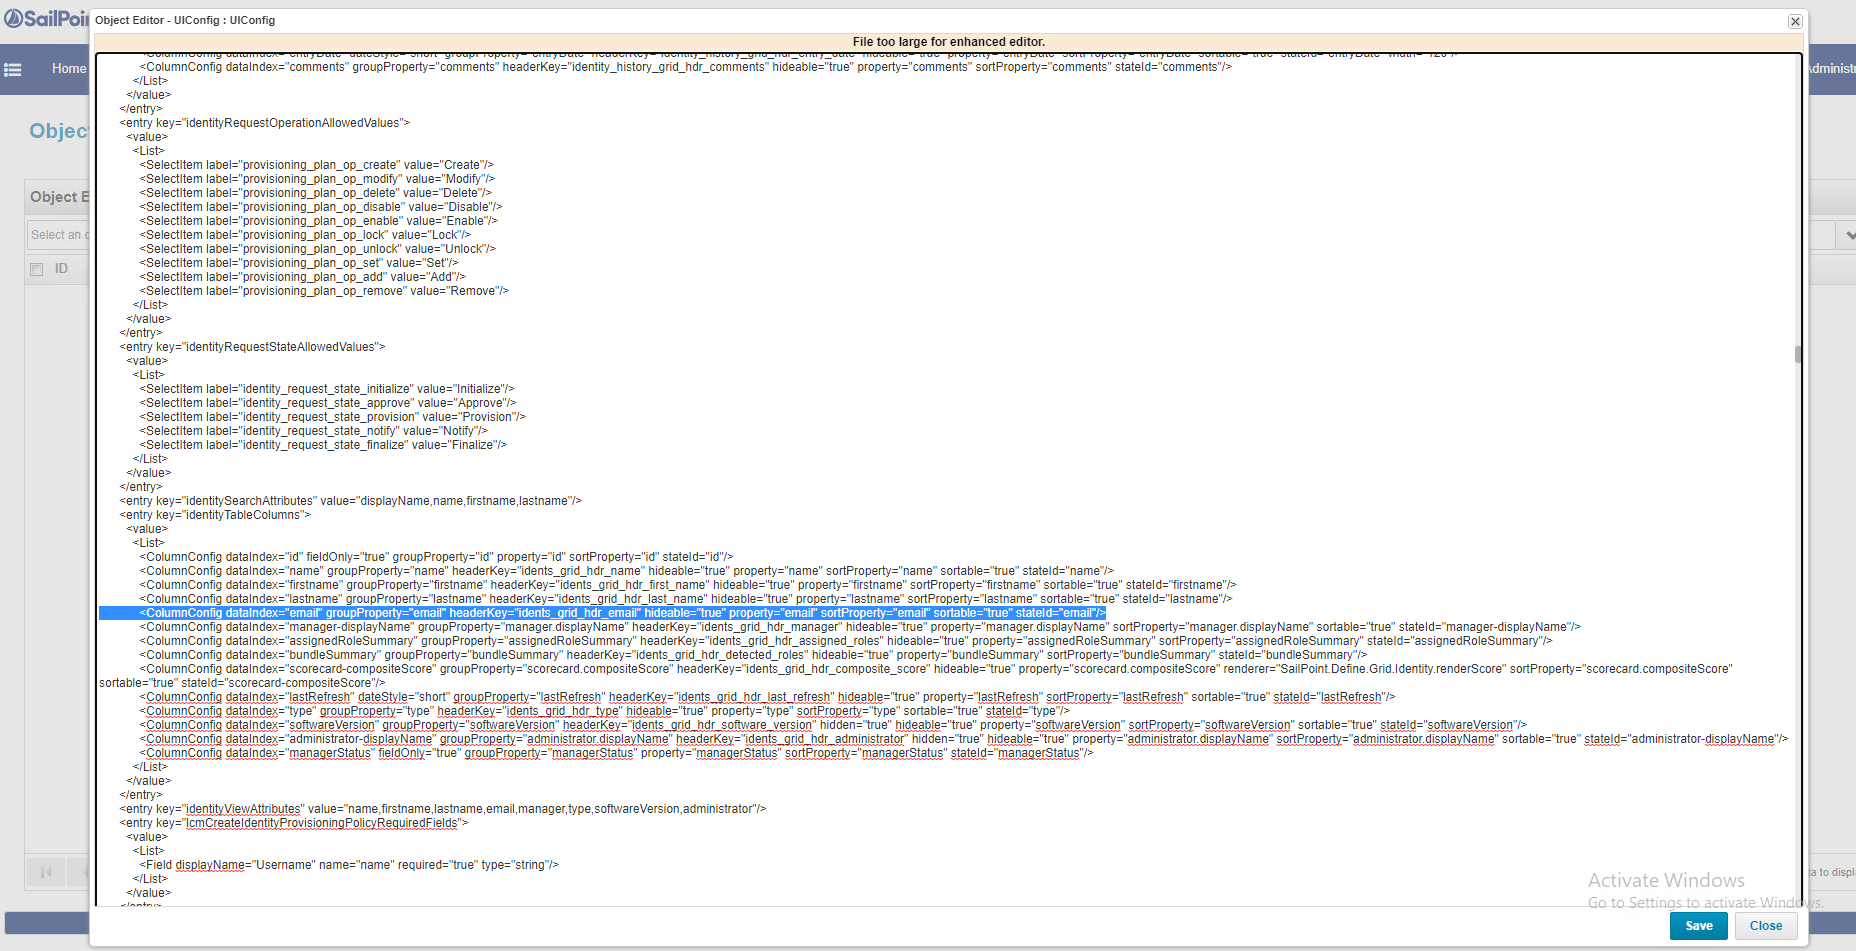
5. Now proceed and add a new entry that represents the Email field in the database.
<ColumnConfig dataIndex=”email” groupProperty=”email” headerKey=”idents_grid_hdr_email” hideable=”true” property=”email” sortProperty=”email” sortable=”true” stateId=”email”/>
Click the Save button
6. Now, go back to the Identity > Identity Warehouse and the Email attribute is now displayed in the table.

Keep visiting us for more quick Sailpoint IdentityIQ technical notes.
Gabriel Magarino
Gabriel Magarino – Senior Security Manager | IAM Evangelist - Experienced leader with over 20 years in the IT and cybersecurity industry, specializing in Identity & Access Management. Expert in Okta, One Identity, SailPoint (IdentityIQ & IdentityNow), OneLogin, Delinea, and CyberArk. Passionate about exploring IAM and emerging technologies, coaching, and training IAM teams. Holds a Master’s in Computer Science and multiple certifications, including Okta Professional & Administration, One Identity Architect & Instructor, SailPoint Identity Now, ITIL, Scrum Master, among others. Currently pursuing a PhD with a focus on Computer Science and Artificial Intelligence.