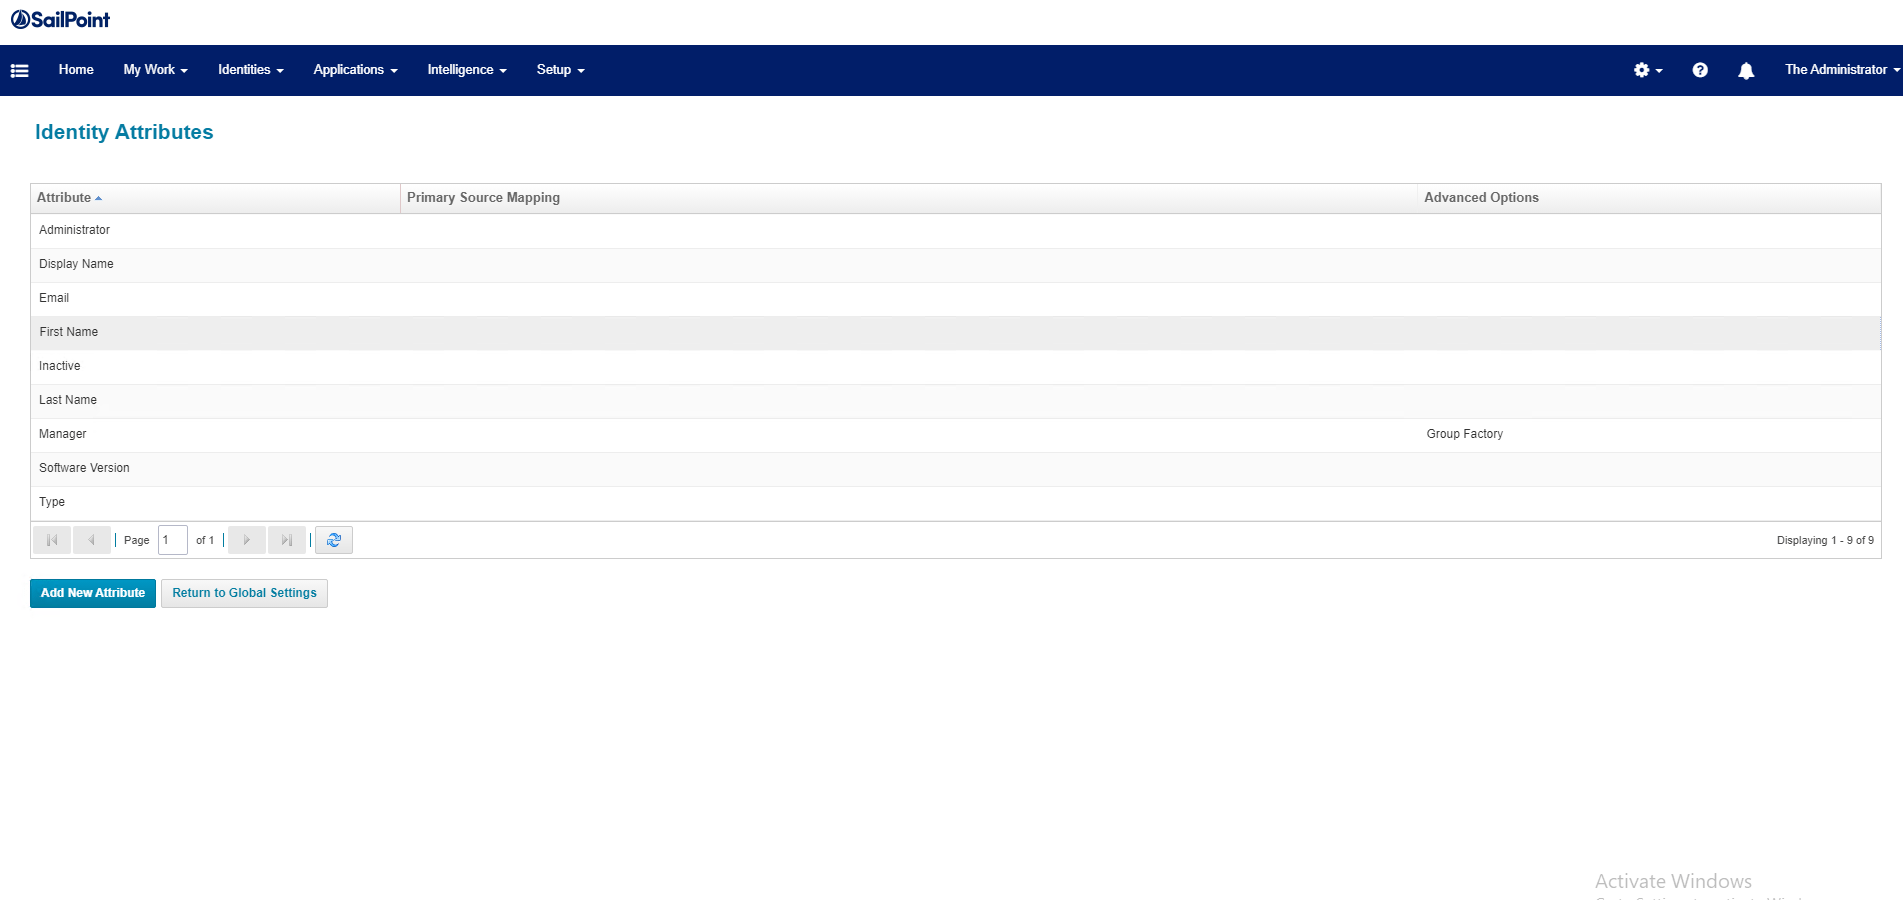
Another task necessary during your IdentityIQ implementation is the configuration of identity attributes. Following the steps required.
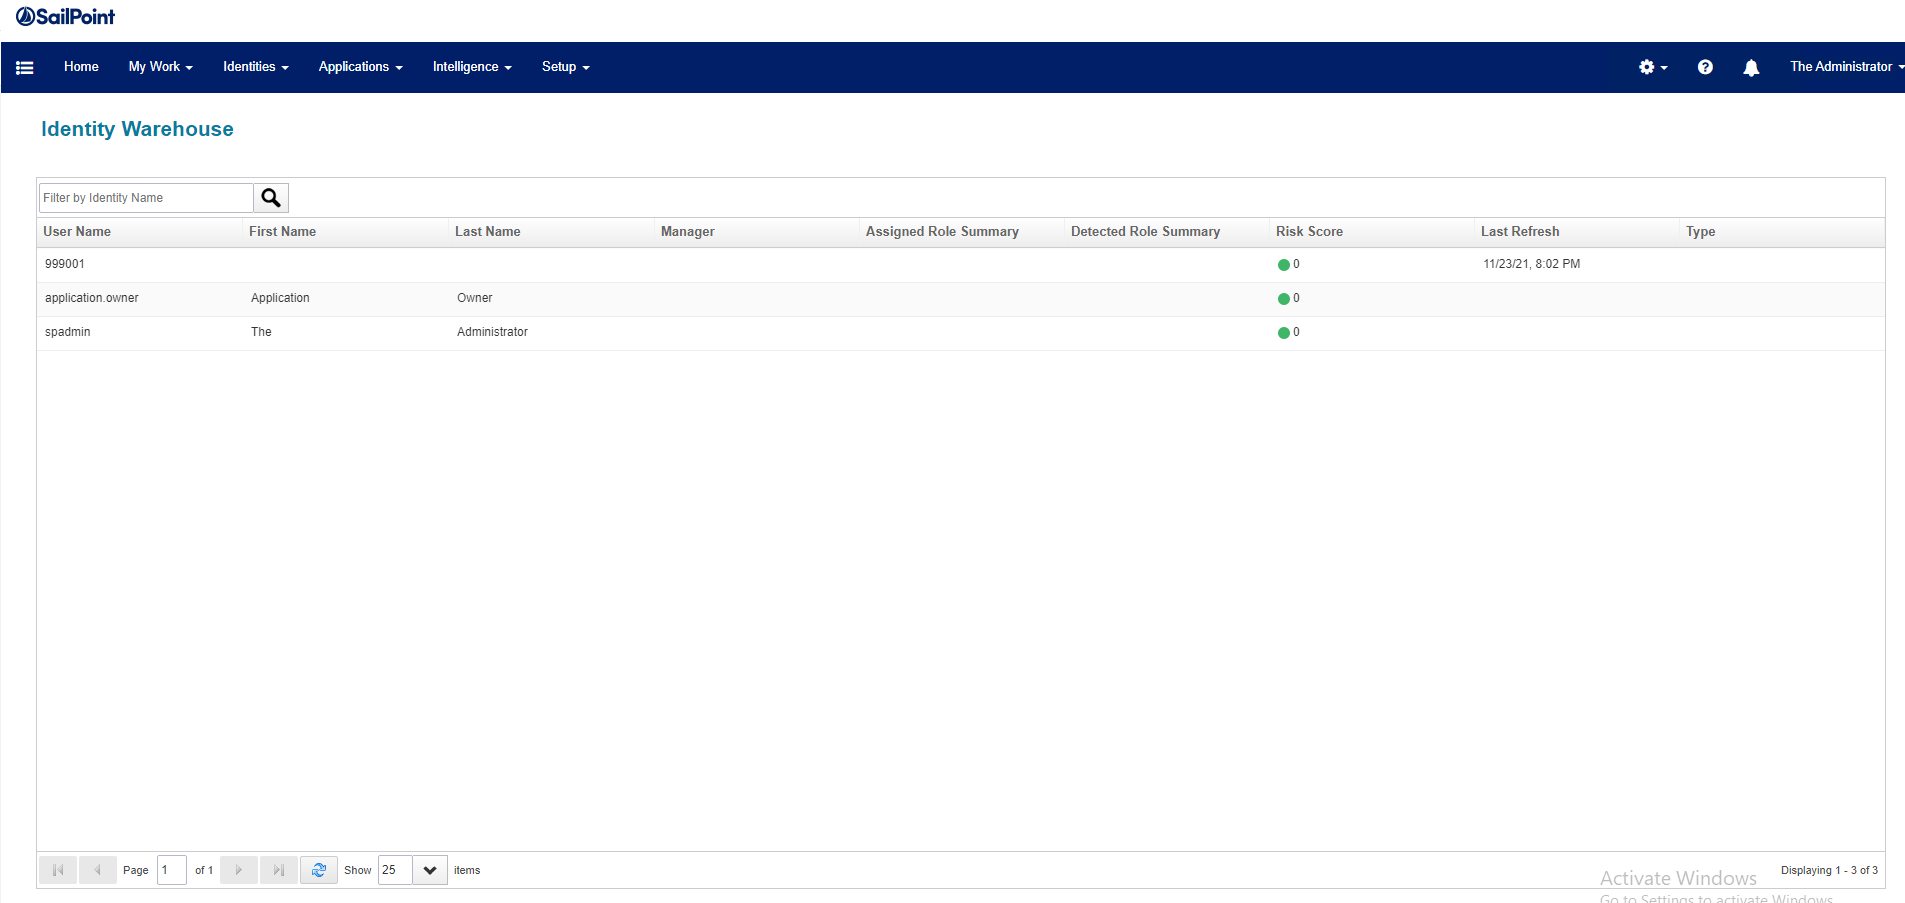
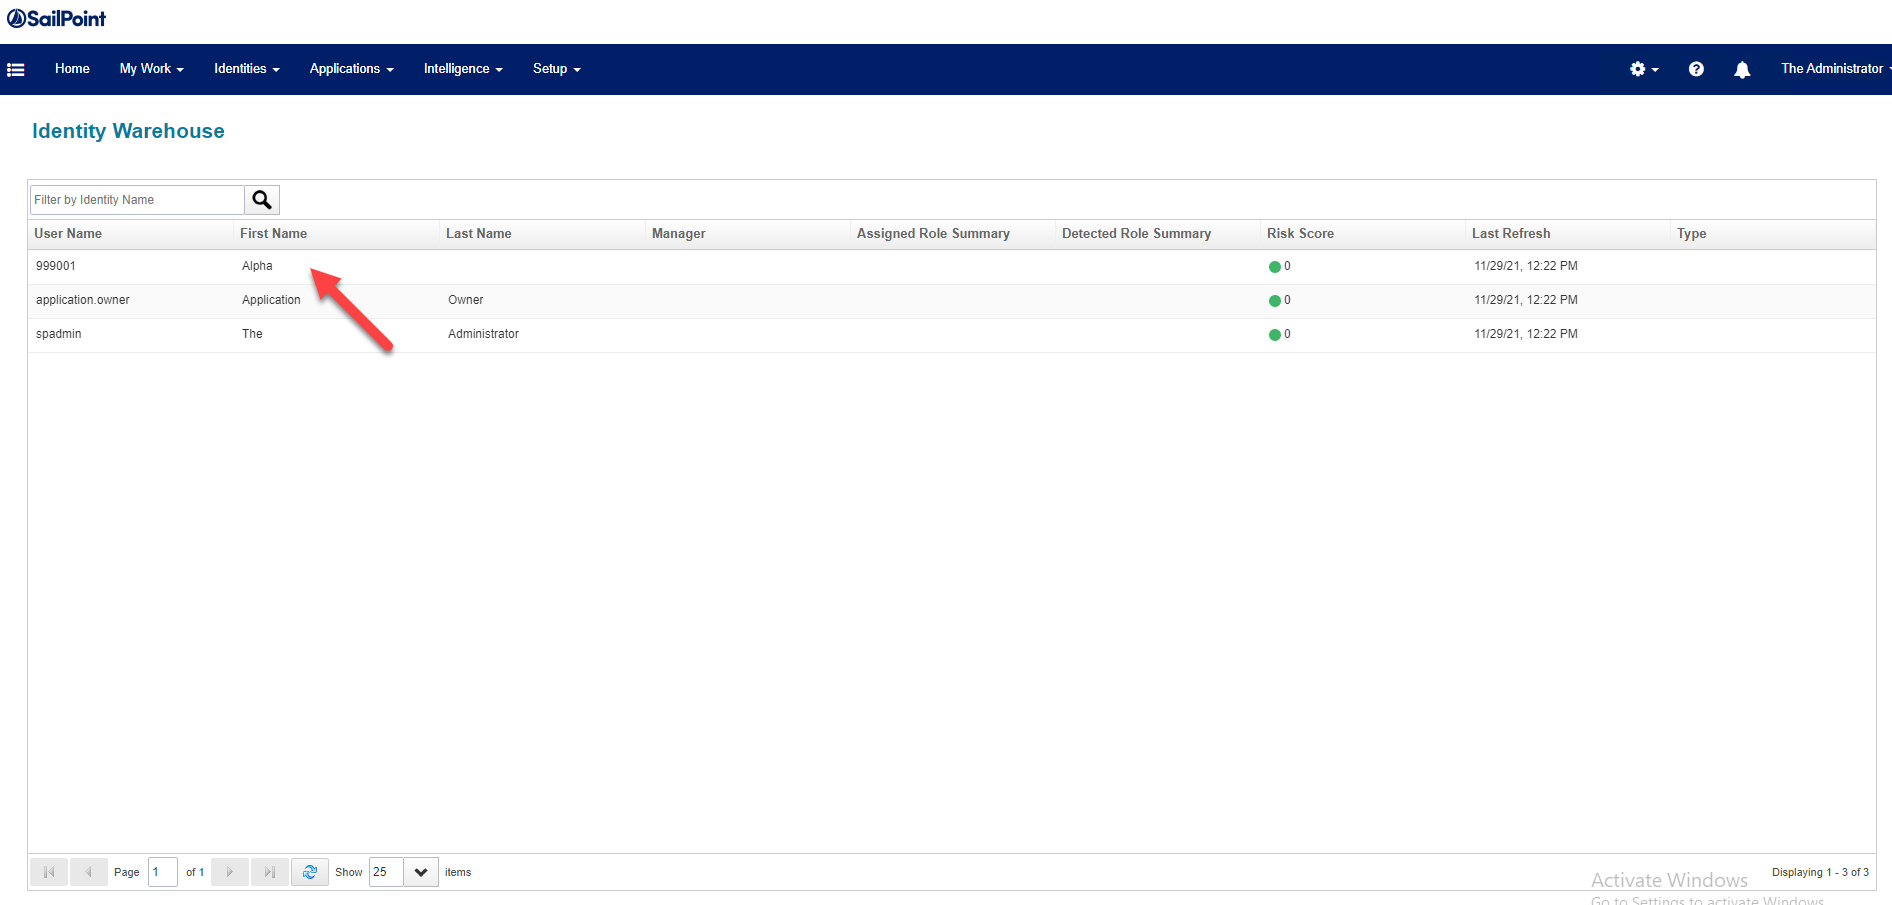
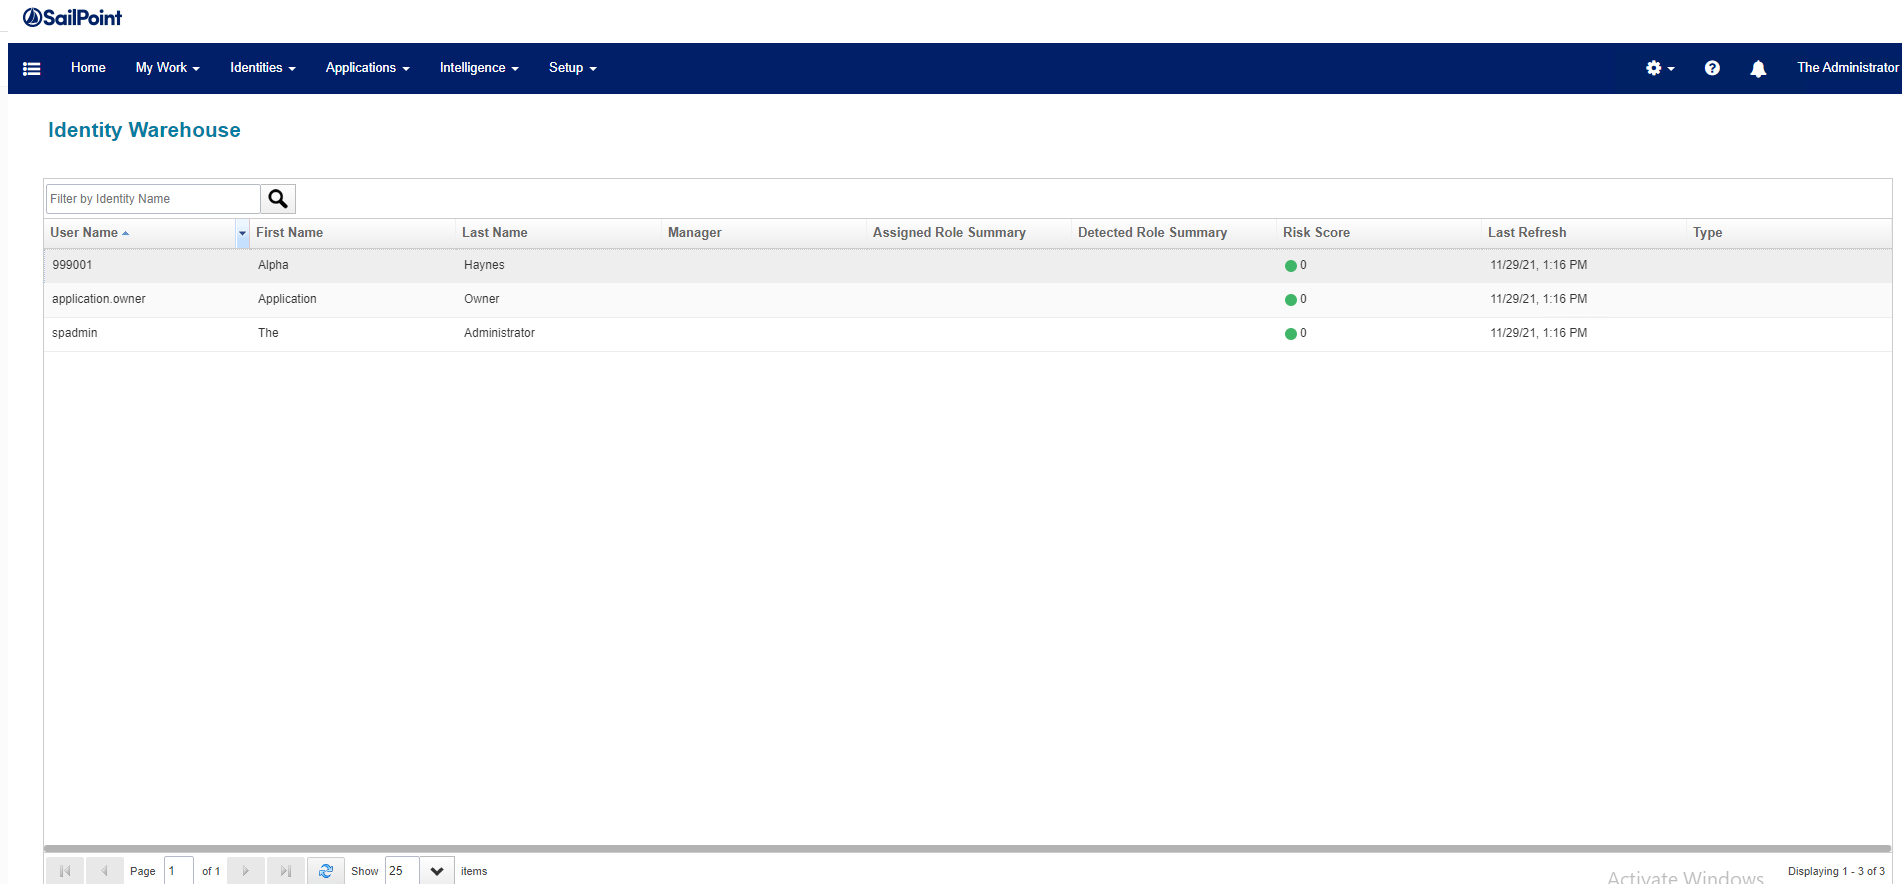
Like we saw in previous post, after creating or importing a new Identity, IdentityIQ was not populating other display attributes like firstname, lastname or email. Select Identities > Identity Warehouse to list the identities.
2. As you can see in the screenshot below, the display name for the user 999001 only shows the User Name display.
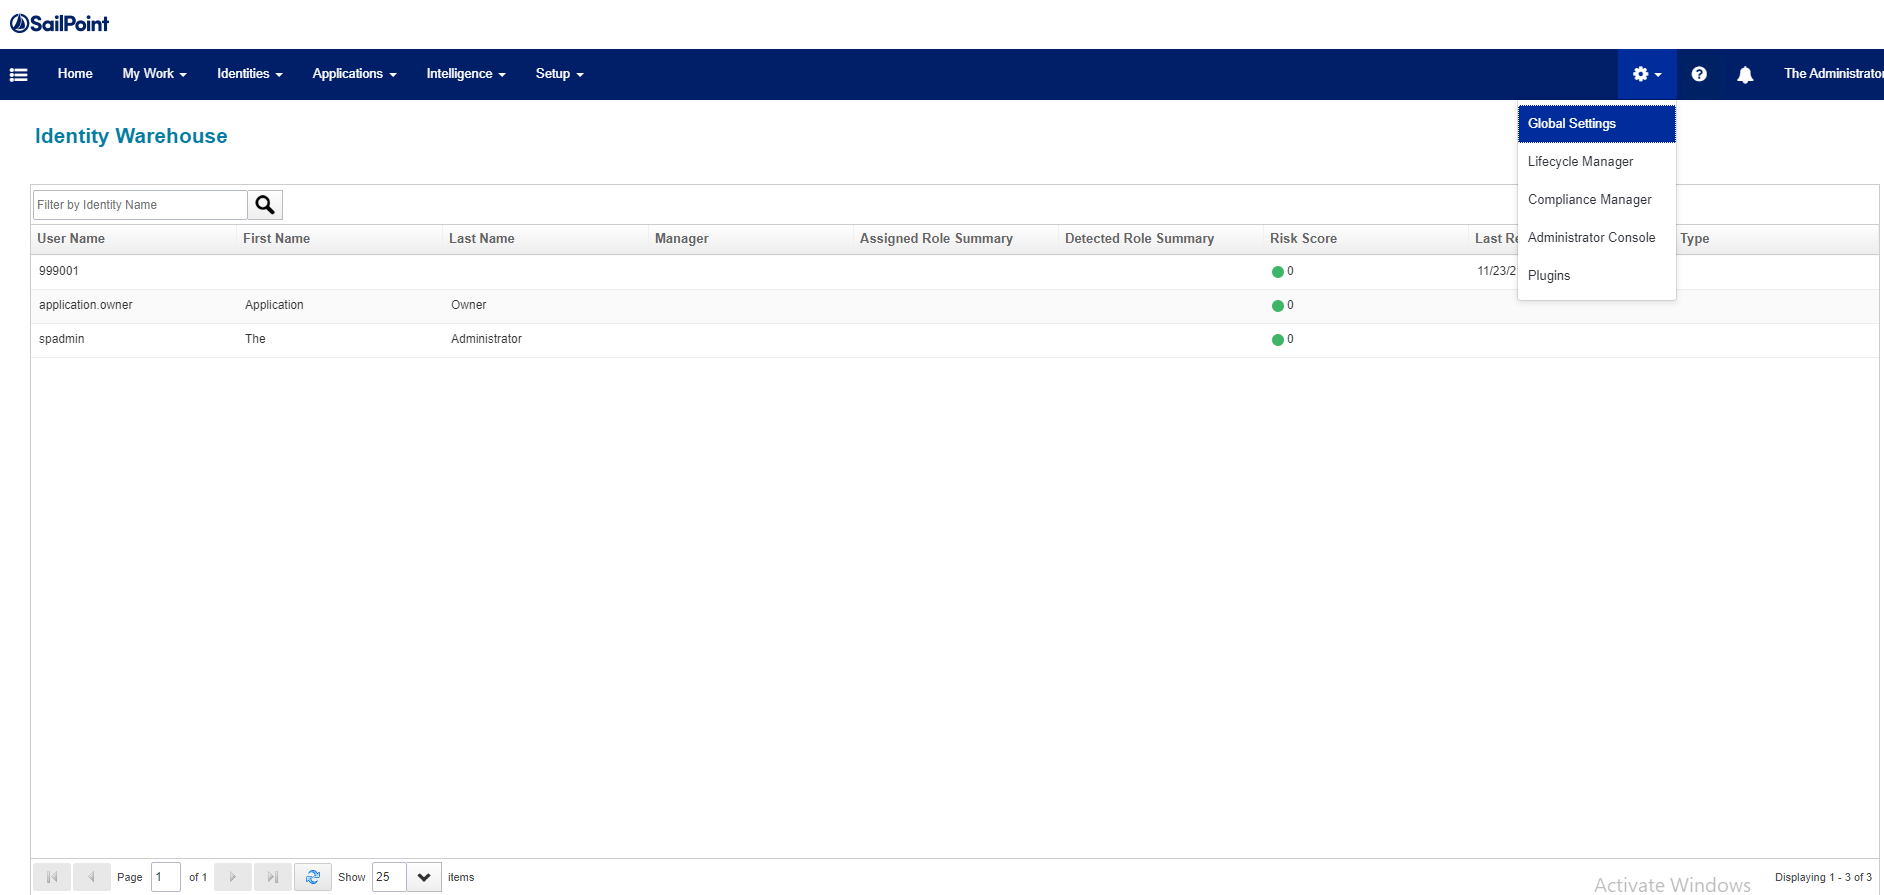
3. Now, to configure additional attributes navigate to Gear > Global setting located top-right.
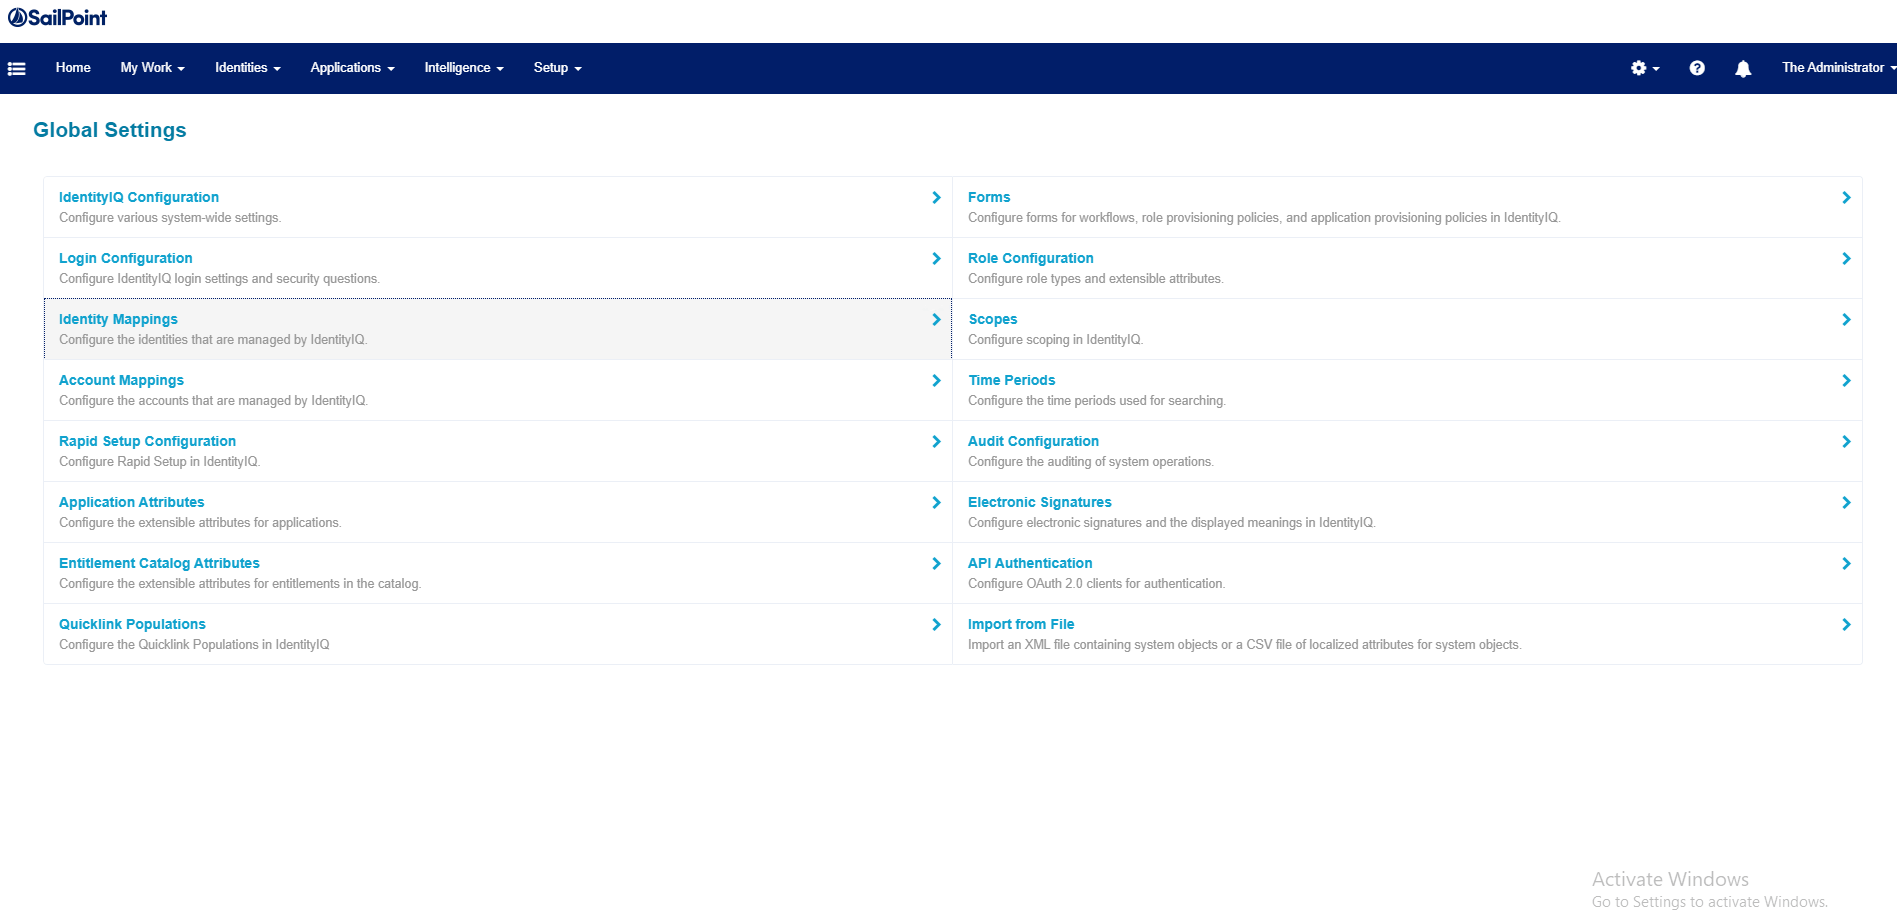
4. Click the Identity Mappings option on your left.
5. from the list of the Identity Attributes, click on the First Name
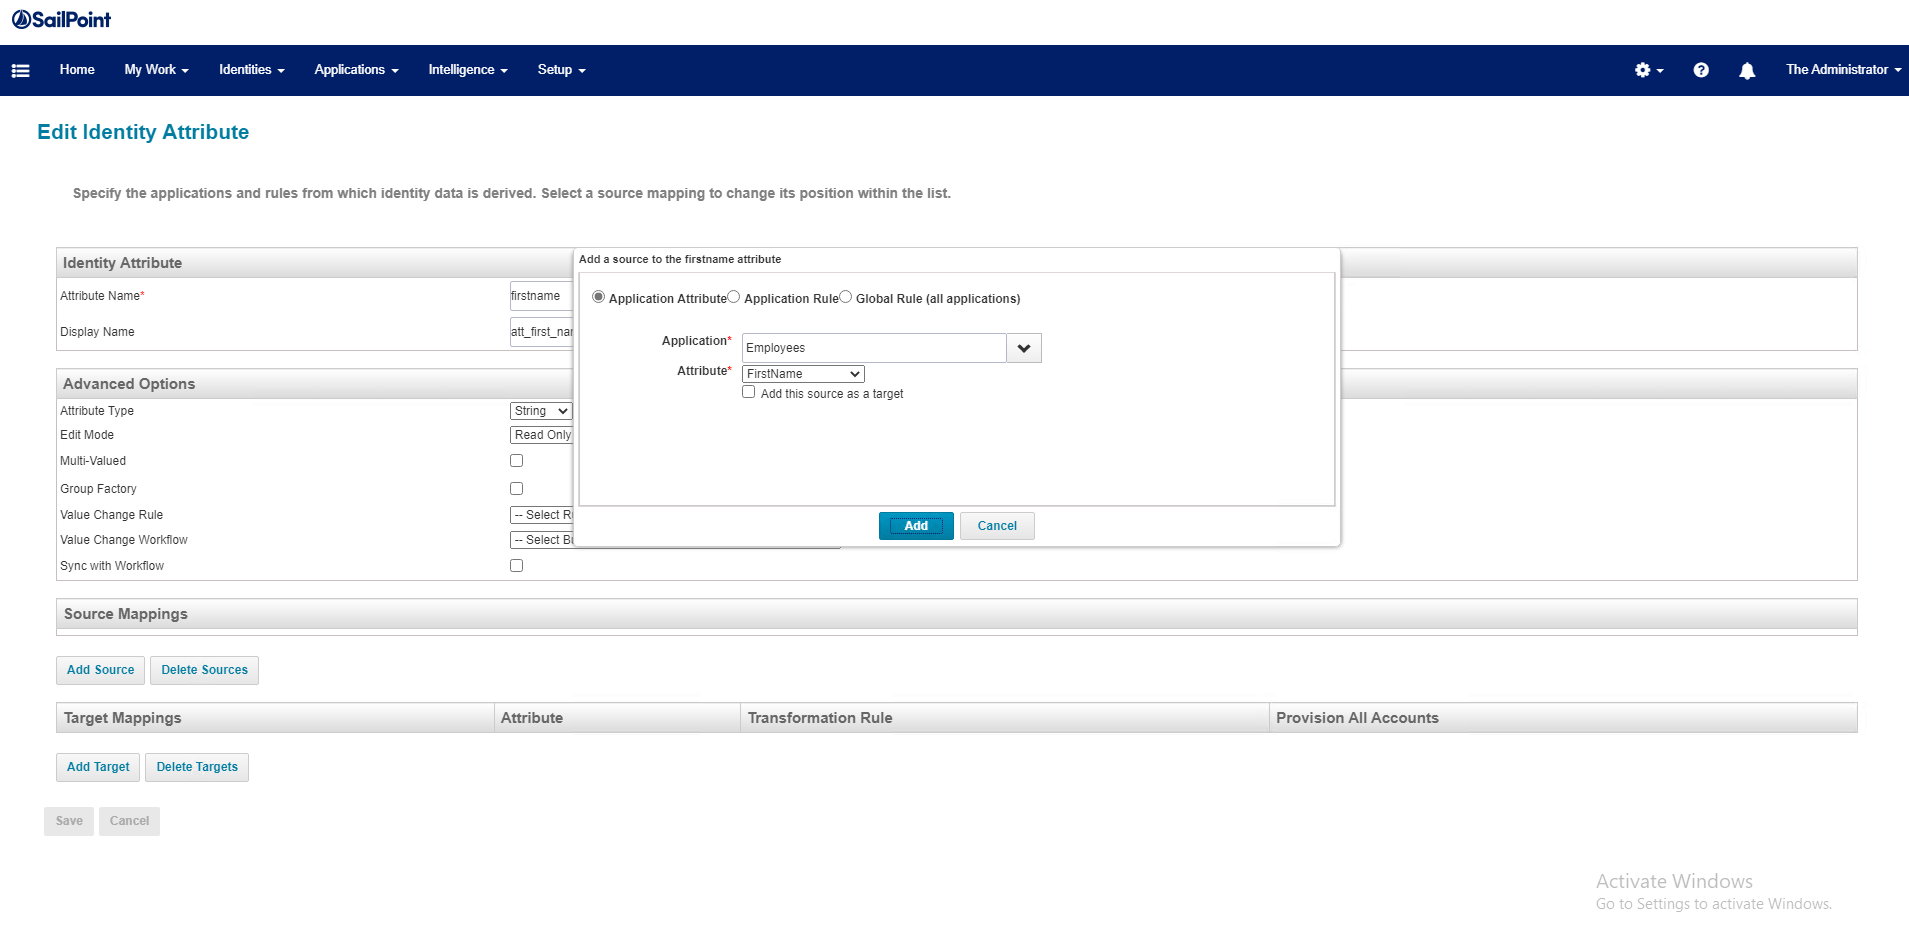
6. From the Edit Identity Attribute screen, go to the bottom and select Add Source

7. From the application and attributes select the following values and click Add
Application: Employees
Attributes: Firstname
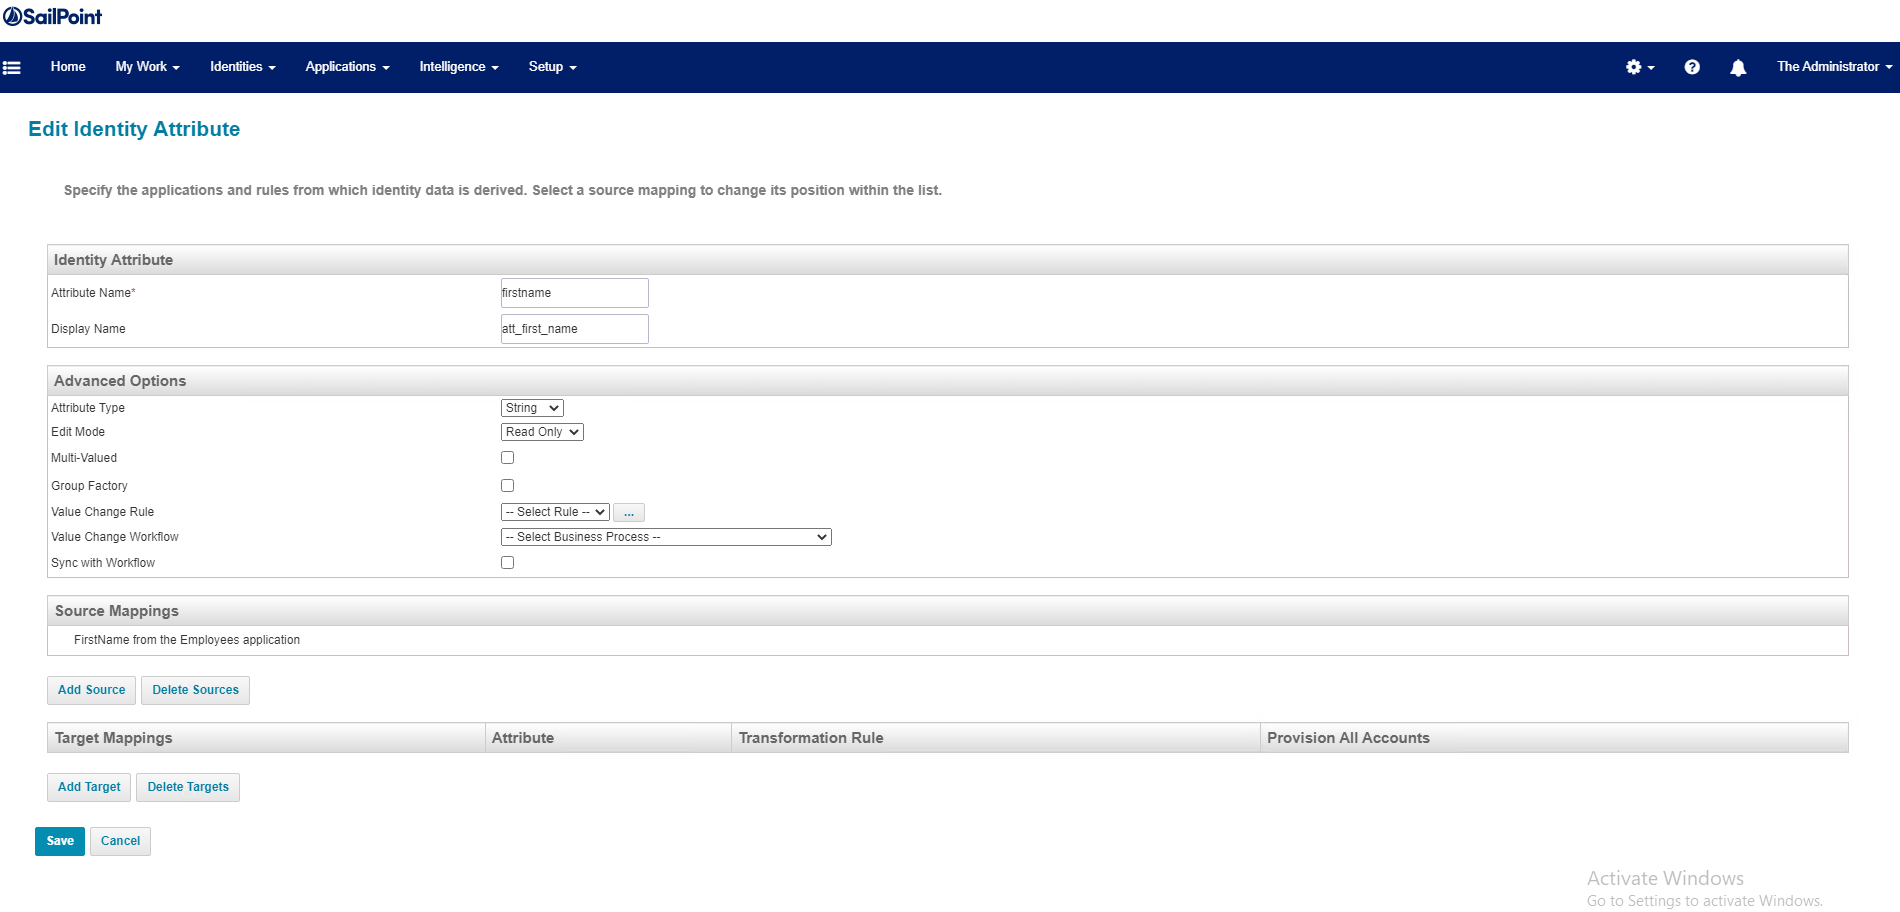
8. IdentityIQ will return to the Edit Identity Attribute, now click the Save button.
9. Now, we need to run a task to refresh the identities. Navigate to Tasks and run the Refresh Identity Cube. This will perform a full refresh of all identities.
10. Now go back to the Identities > Identity Warehouse to see the list of identities. Now you will see the First Name display name populated for the 999001.
11. Now we will repeat the same for the last name and email. The screen below shows the Last Name display name populated.
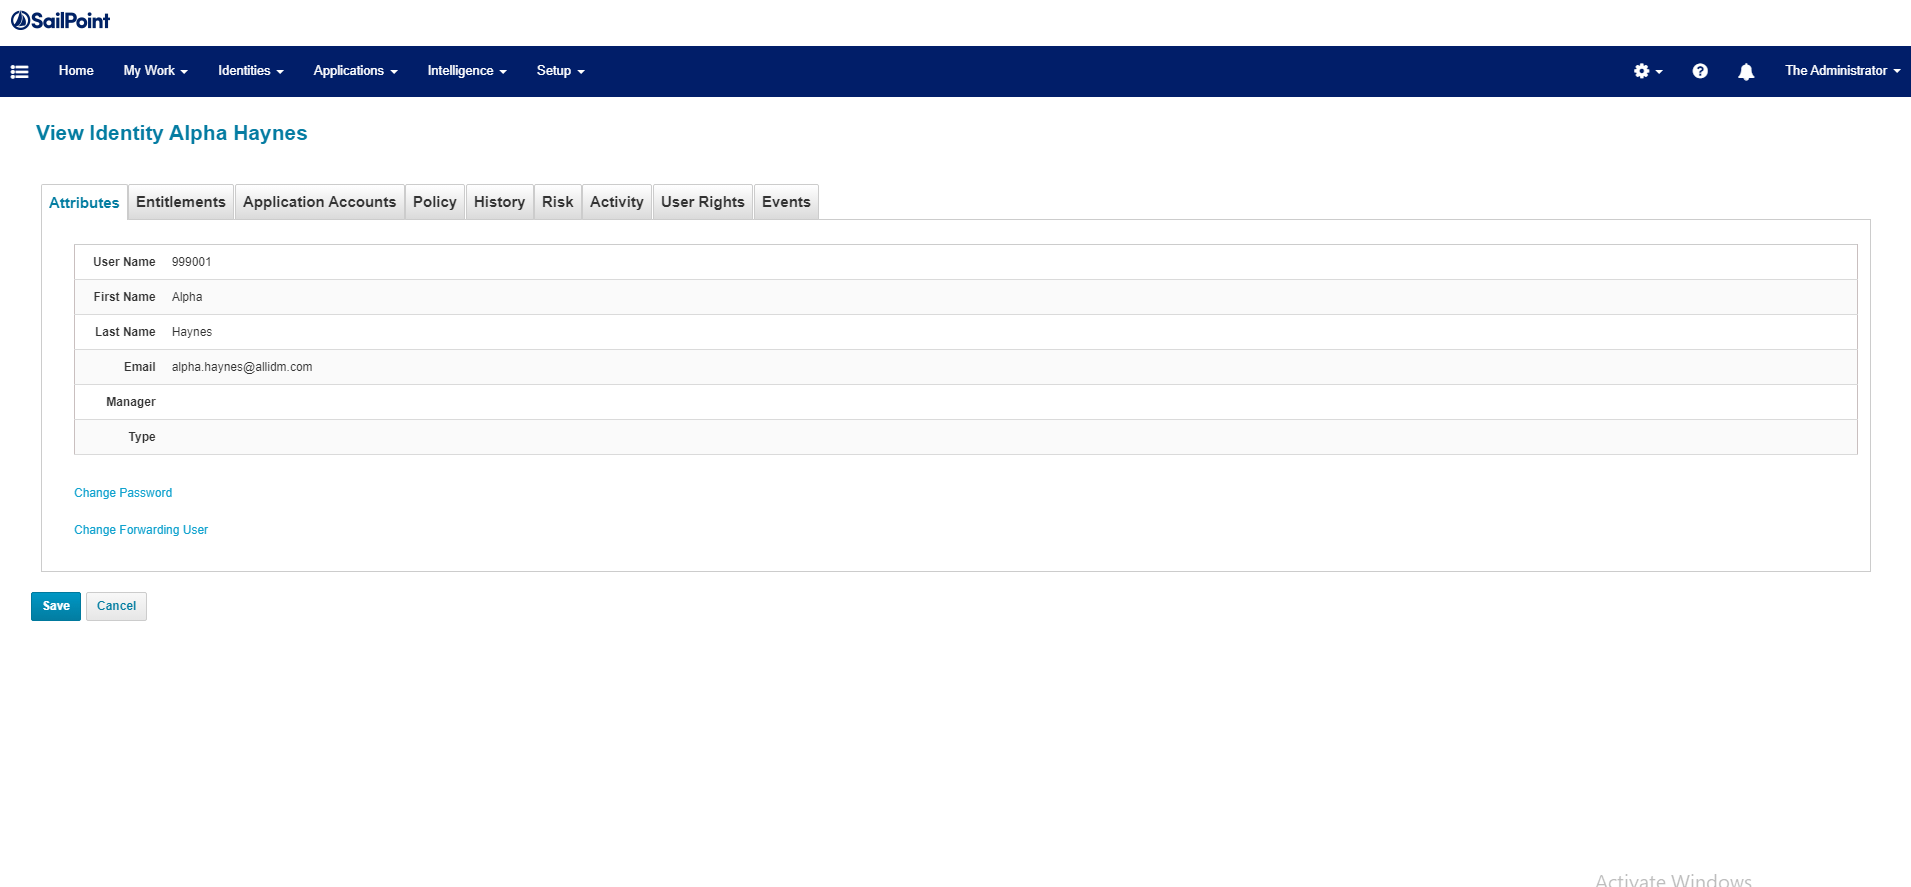
12. We clicked on the 999001 to see the identity attributes and now Email display attribute is populated.
Keep checking our web site for more IdentityIQ reviews.
Gabriel Magarino
Gabriel Magarino – Senior Security Manager | IAM Evangelist - Experienced leader with over 20 years in the IT and cybersecurity industry, specializing in Identity & Access Management. Expert in Okta, One Identity, SailPoint (IdentityIQ & IdentityNow), OneLogin, Delinea, and CyberArk. Passionate about exploring IAM and emerging technologies, coaching, and training IAM teams. Holds a Master’s in Computer Science and multiple certifications, including Okta Professional & Administration, One Identity Architect & Instructor, SailPoint Identity Now, ITIL, Scrum Master, among others. Currently pursuing a PhD with a focus on Computer Science and Artificial Intelligence.