Create identities is one of the first actions to perform after you install your Sailpoint IdentityIQ product. Identities are created automatically ( from an authoritative source ) or manually using the IdentityIQ UI. Below the steps required to create manually an identity cube into IdentityIQ.
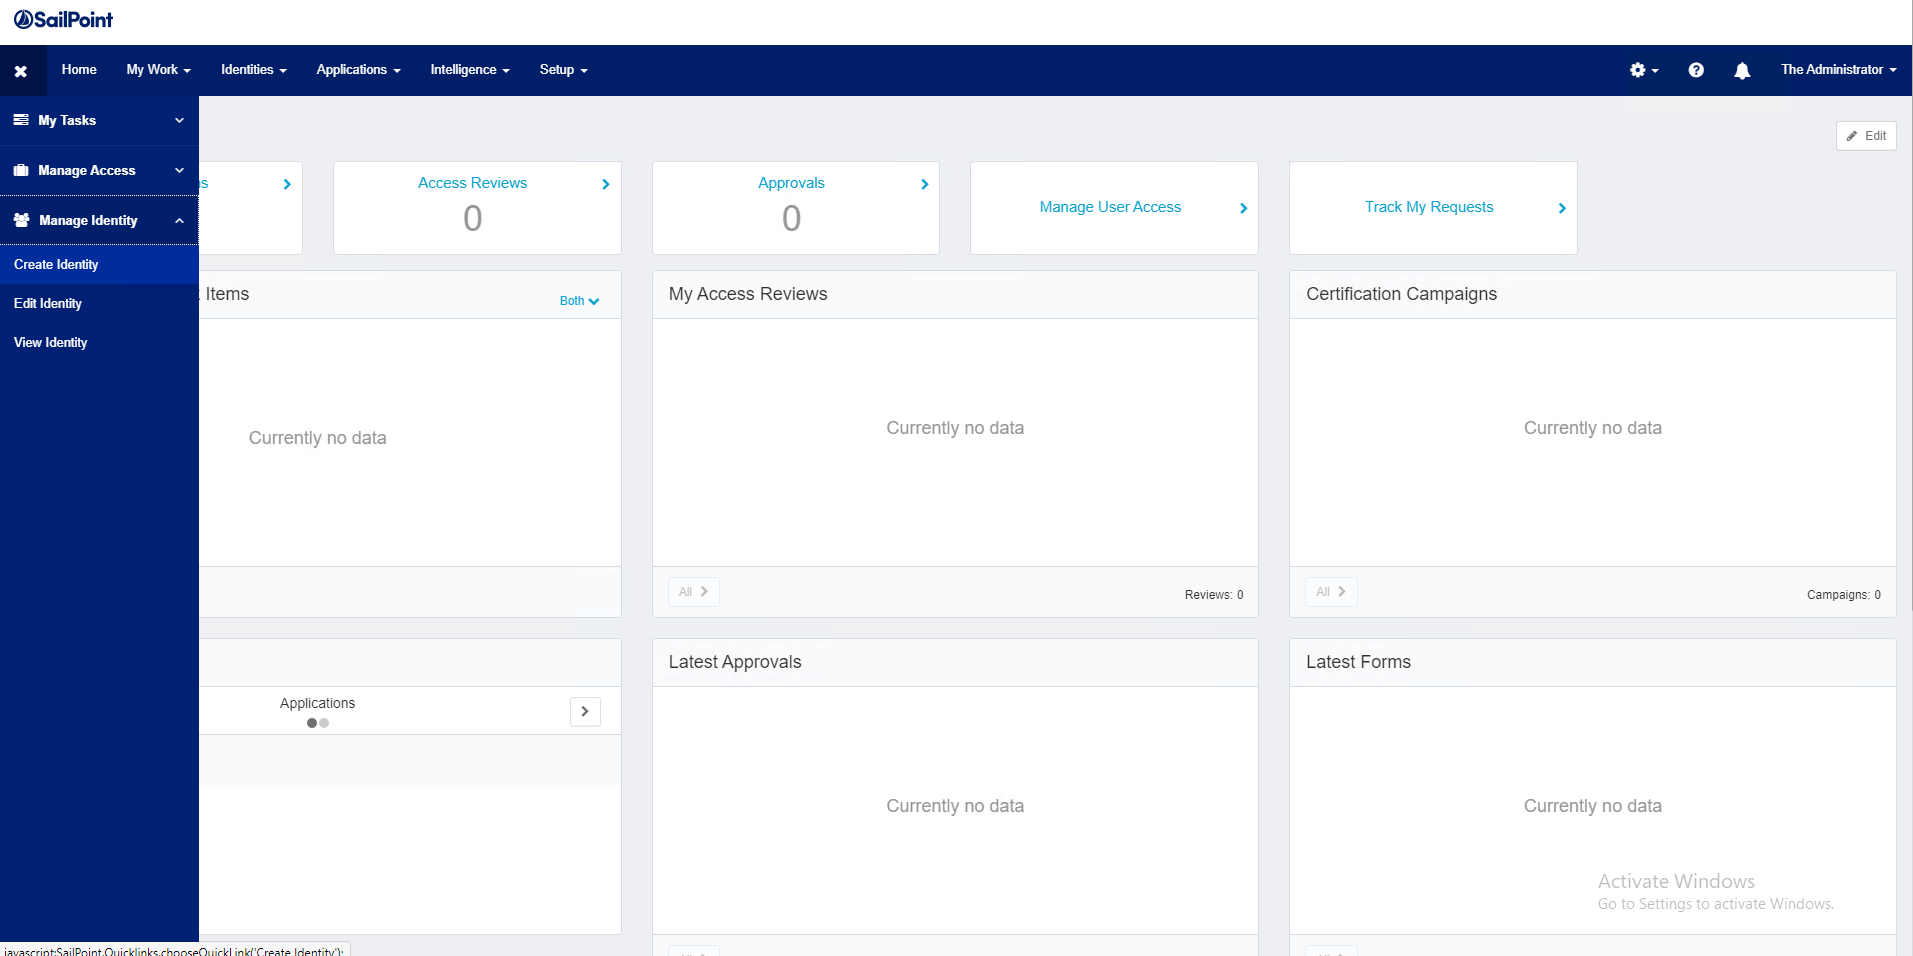
- Go to the home page for your IdentityIQ instance (8080/identityiq/home.jsf)
- Select the Manage Identity and click Create Identity
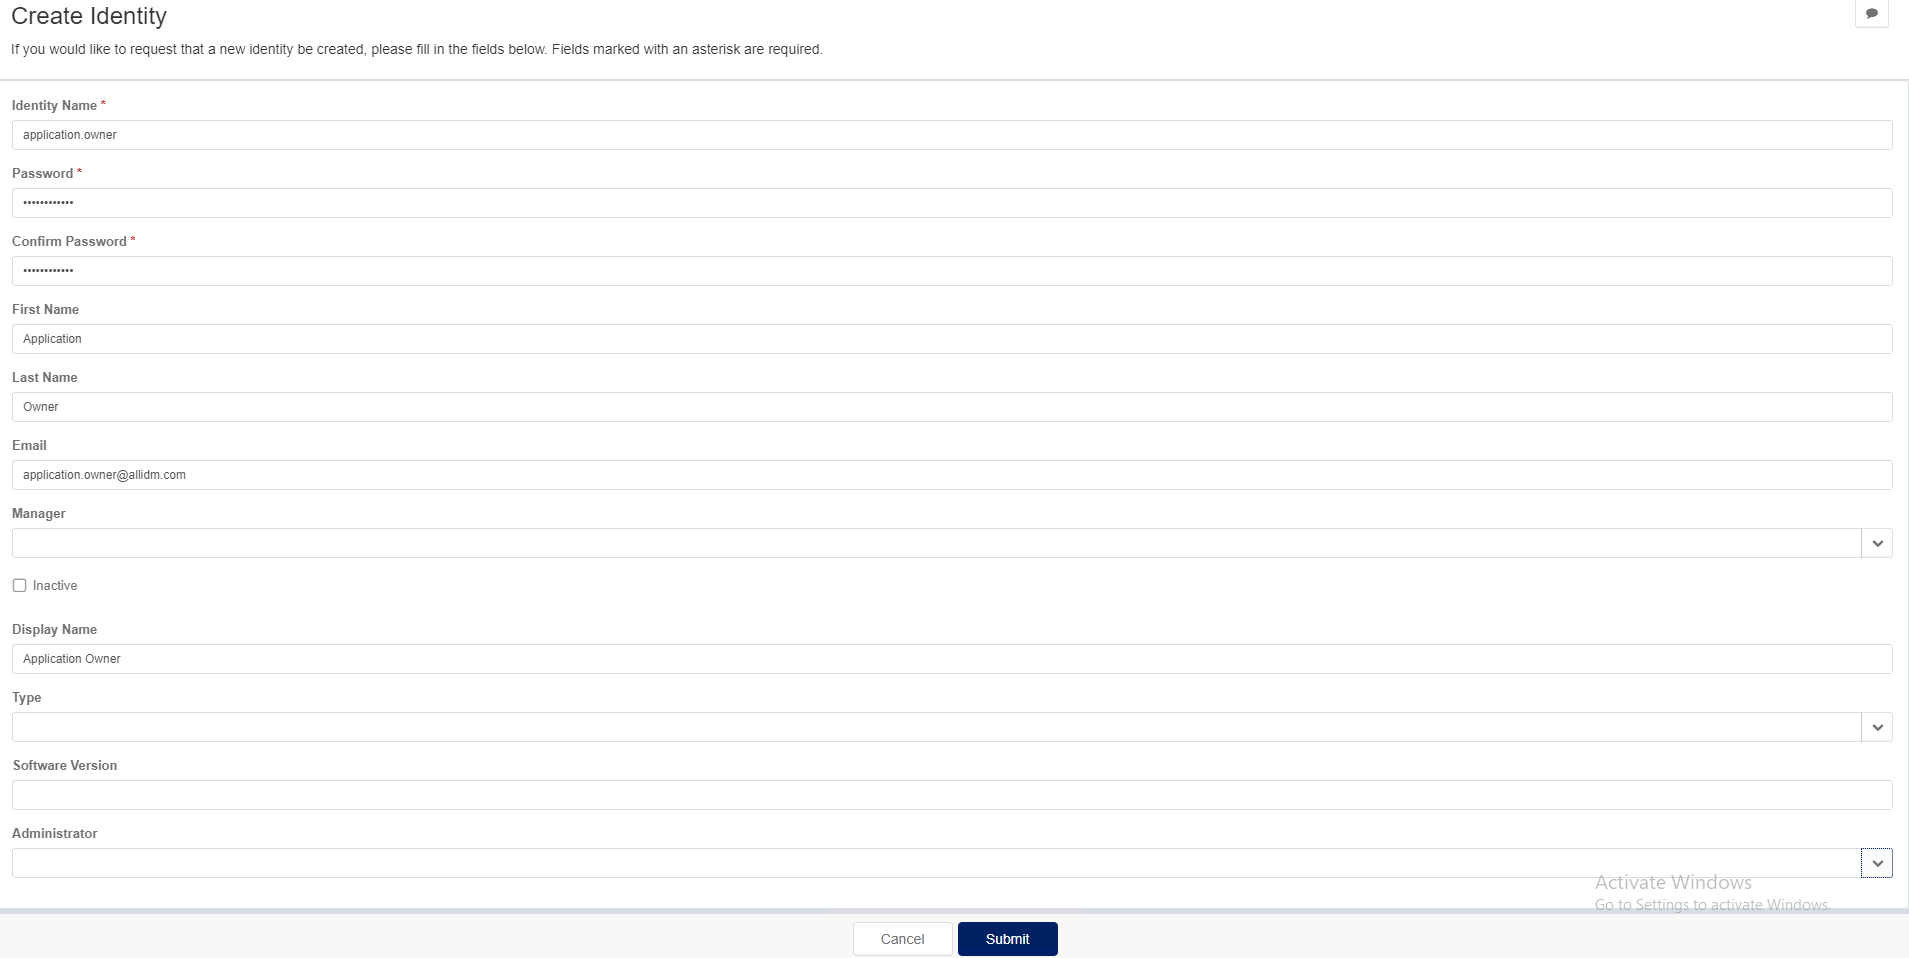
3. IdentityIQ open the Create Identity page. Complete the required field ( marked with red *)
4. Once completed, press the Submit button.
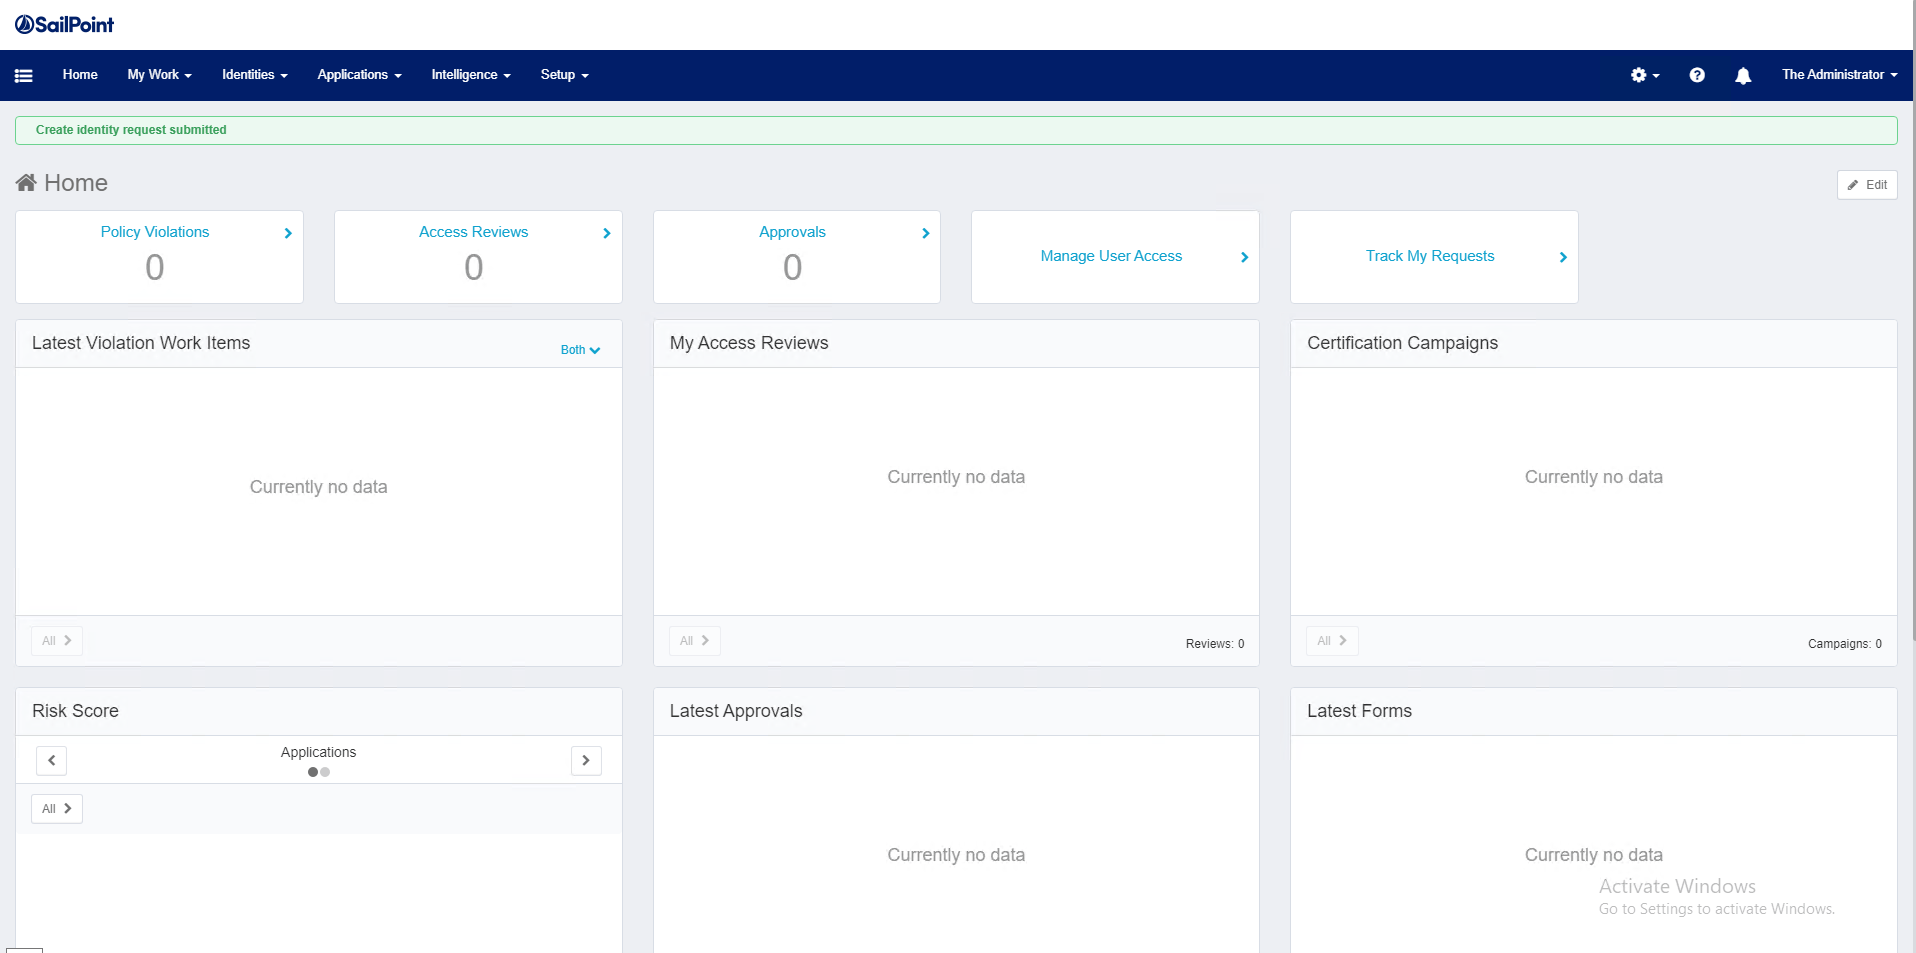
5. IdentityIQ will generate a message at the top of the dashboard notifying you “Create identity request submitted”.
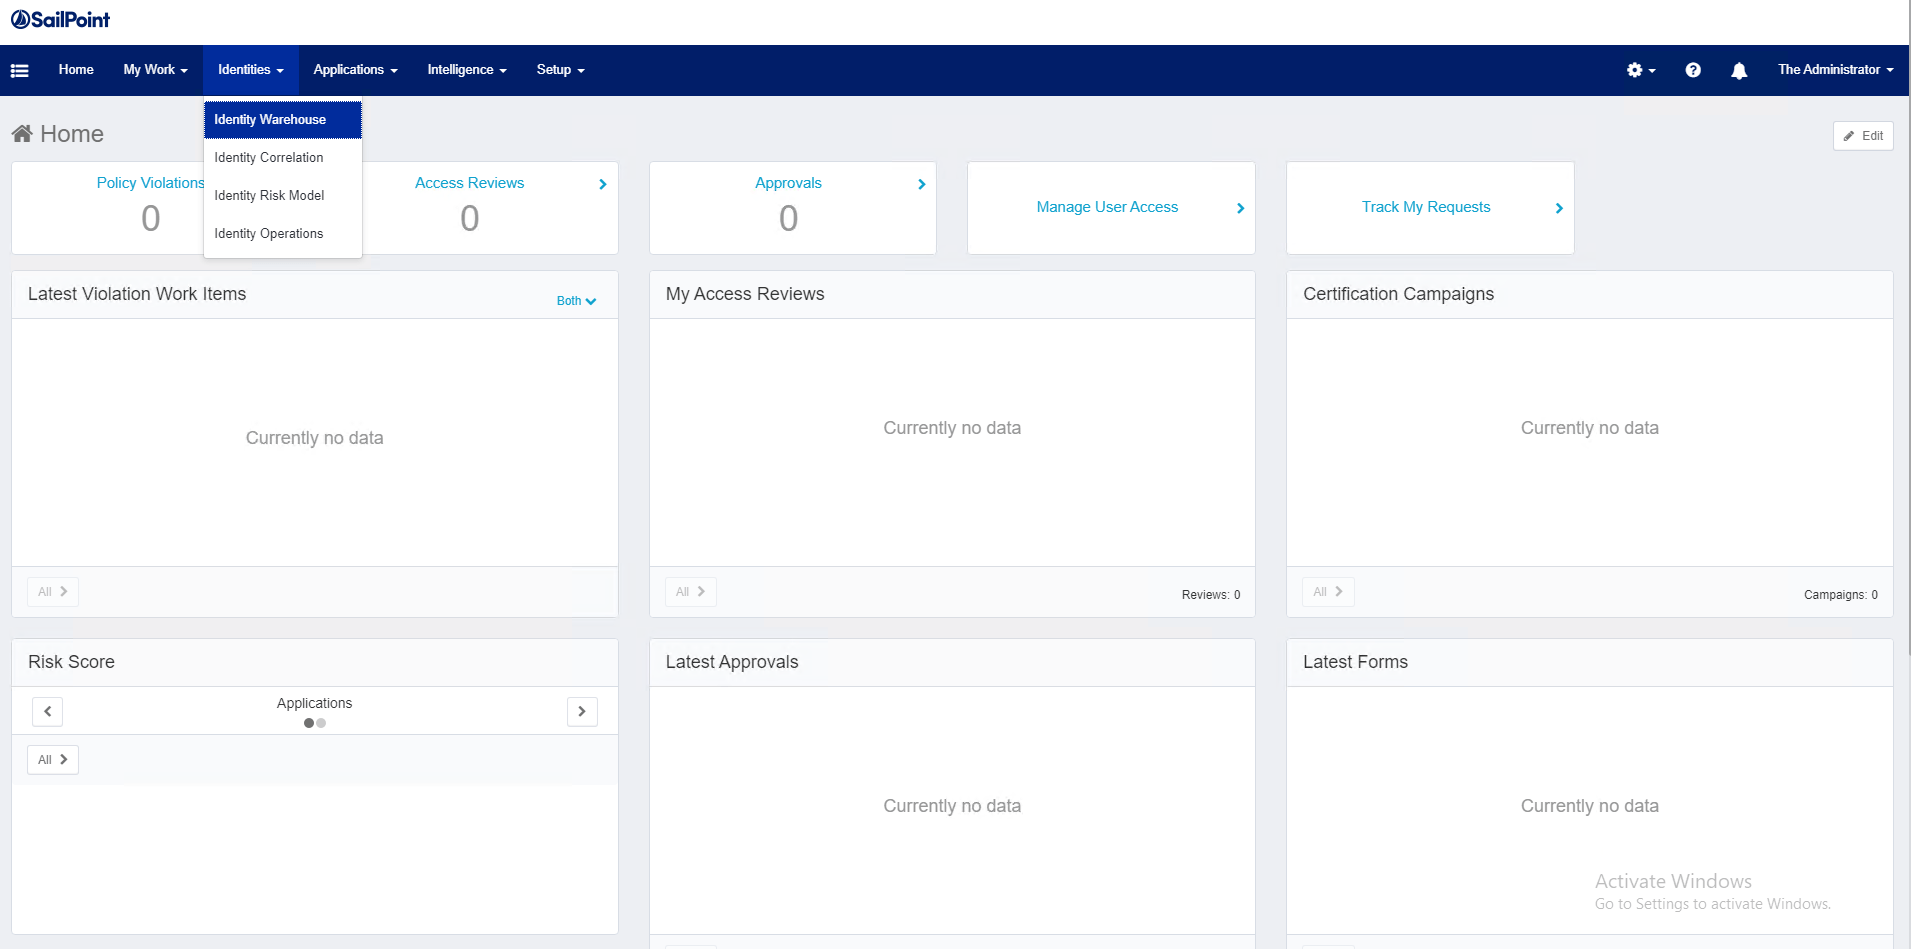
6. At this point, IdentityIQ created the Identity. To verify the creation, click under Identities Menu and select the Identity Warehouse option.
7. IdentityIQ will display the list of available identities. Select the one you just created to see the details.
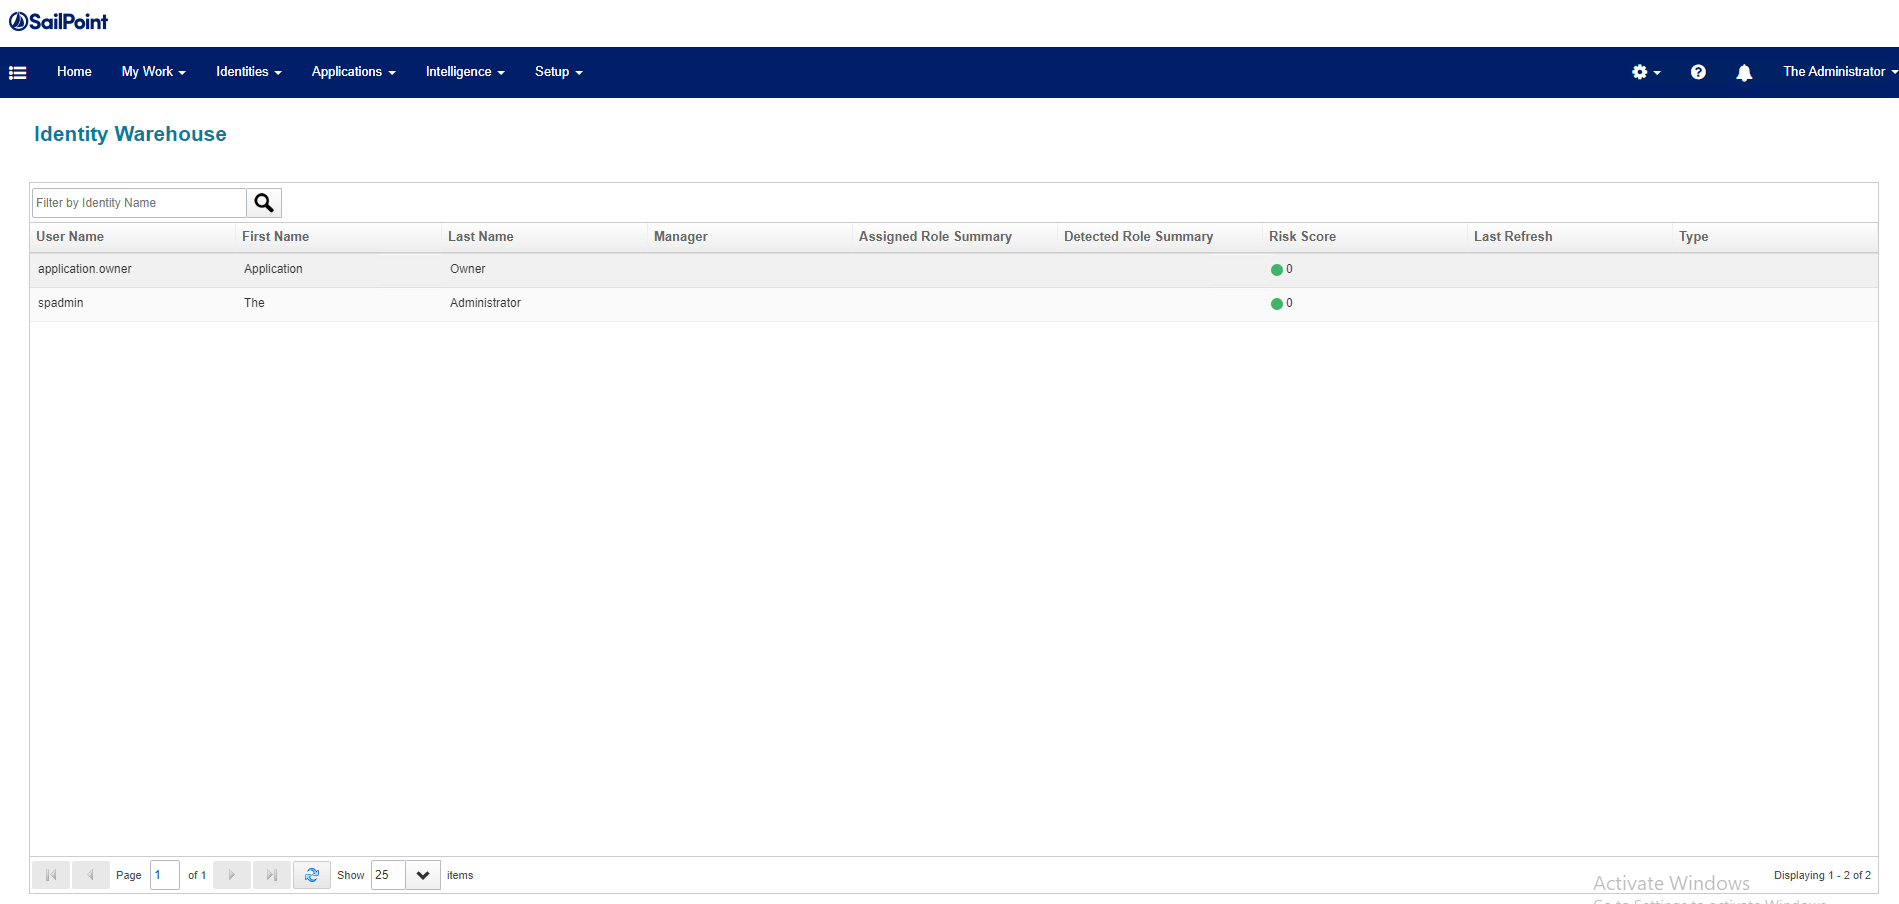
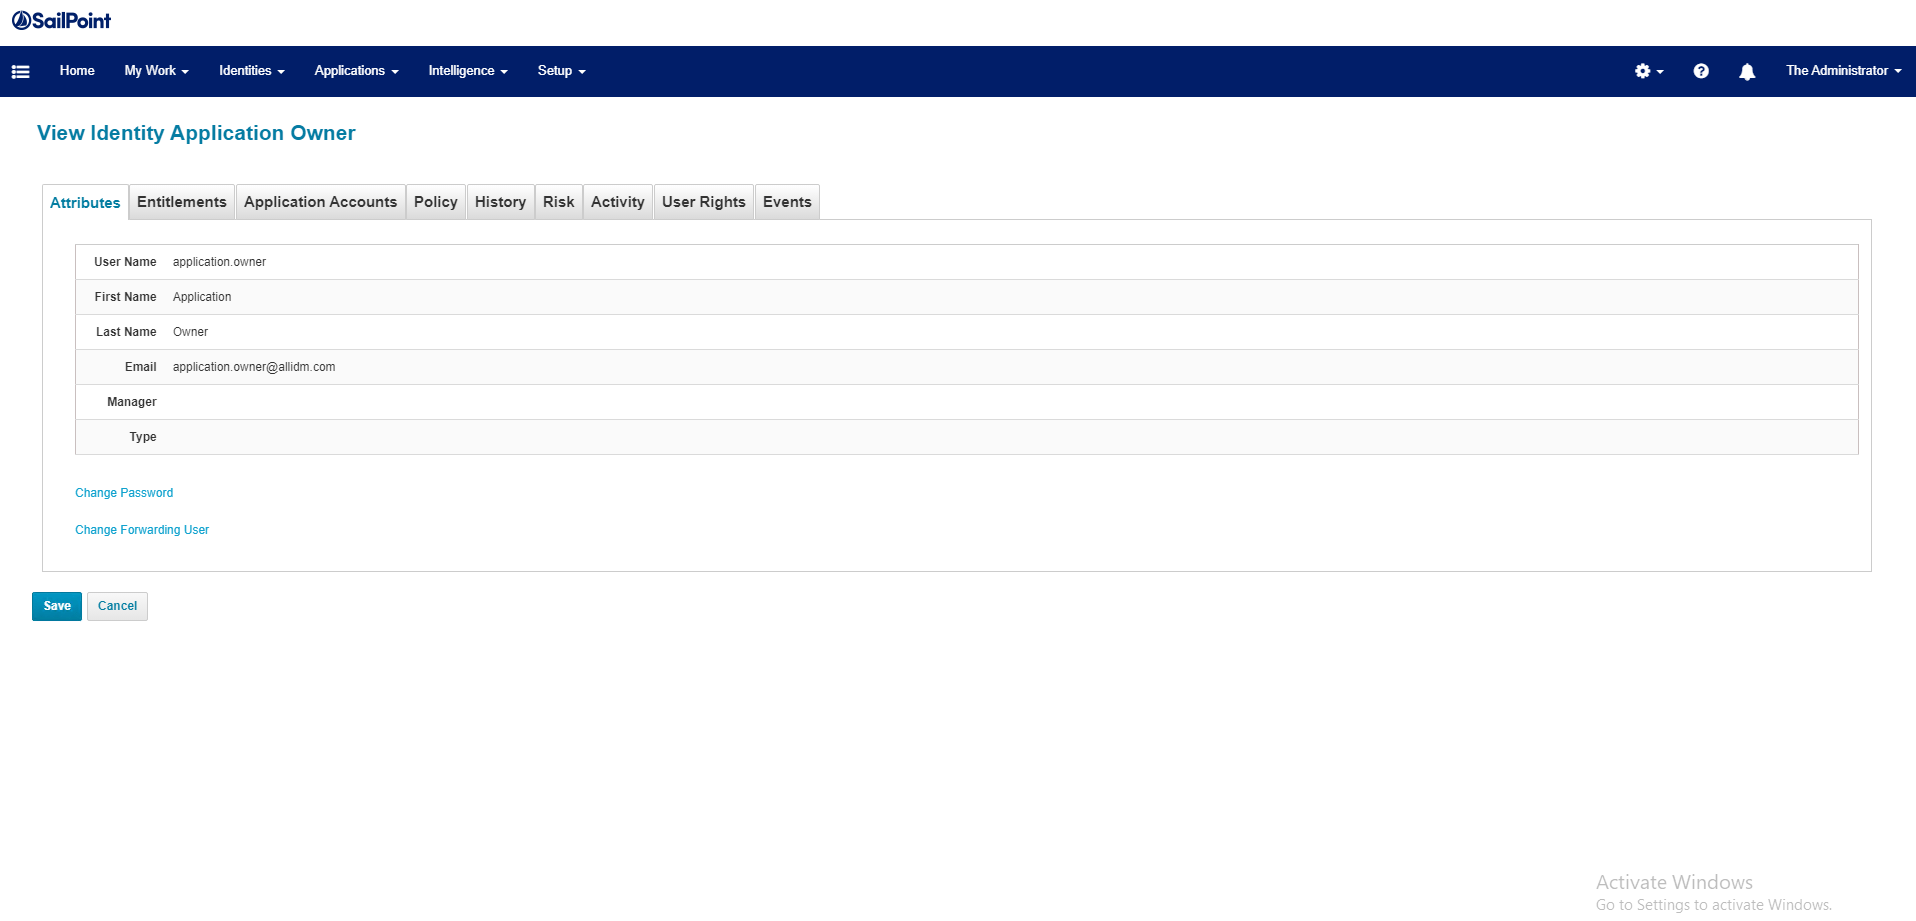
8. After you selected the identity, IdentityIQ displays the information captured that represents the identity.
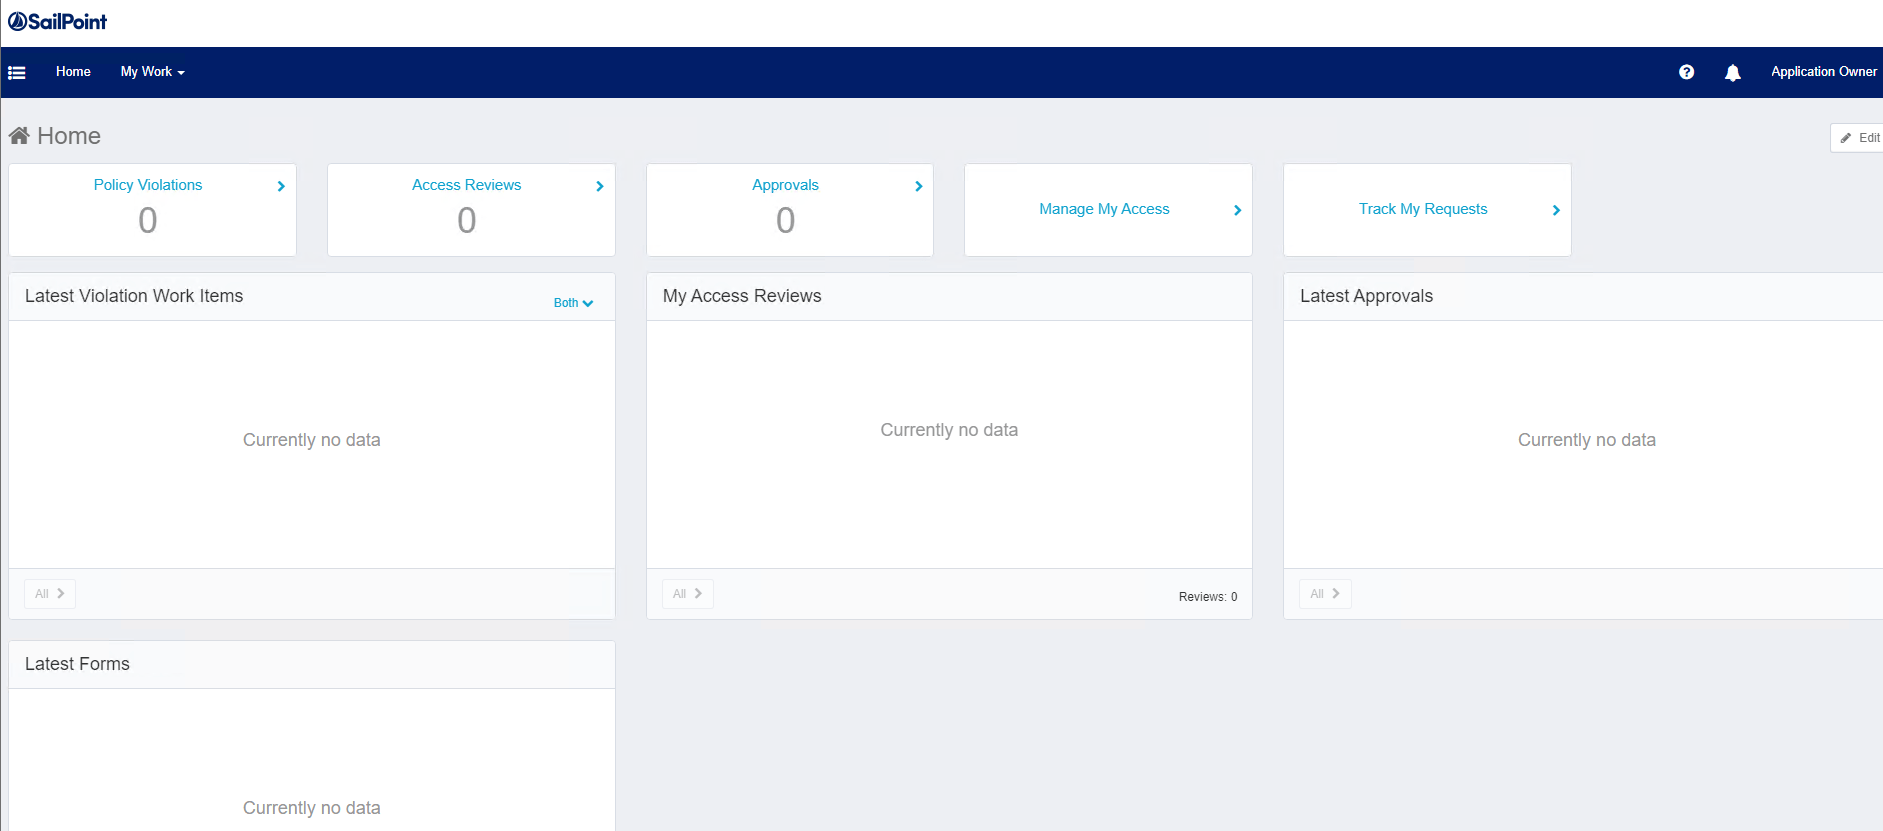
After the Identity is created, now you can login with their credential into the IdentityIQ portal.

By default, IdentityIQ will present the portal with the minimum permissions/capabilities for the end users.
At this point, your identity is ready for the IdentityIQ system to assign accounts within your organization, as well to assign certain capabilities based in their role.
Gabriel Magarino
Gabriel Magarino – Senior Security Manager | IAM Evangelist - Experienced leader with over 20 years in the IT and cybersecurity industry, specializing in Identity & Access Management. Expert in Okta, One Identity, SailPoint (IdentityIQ & IdentityNow), OneLogin, Delinea, and CyberArk. Passionate about exploring IAM and emerging technologies, coaching, and training IAM teams. Holds a Master’s in Computer Science and multiple certifications, including Okta Professional & Administration, One Identity Architect & Instructor, SailPoint Identity Now, ITIL, Scrum Master, among others. Currently pursuing a PhD with a focus on Computer Science and Artificial Intelligence.