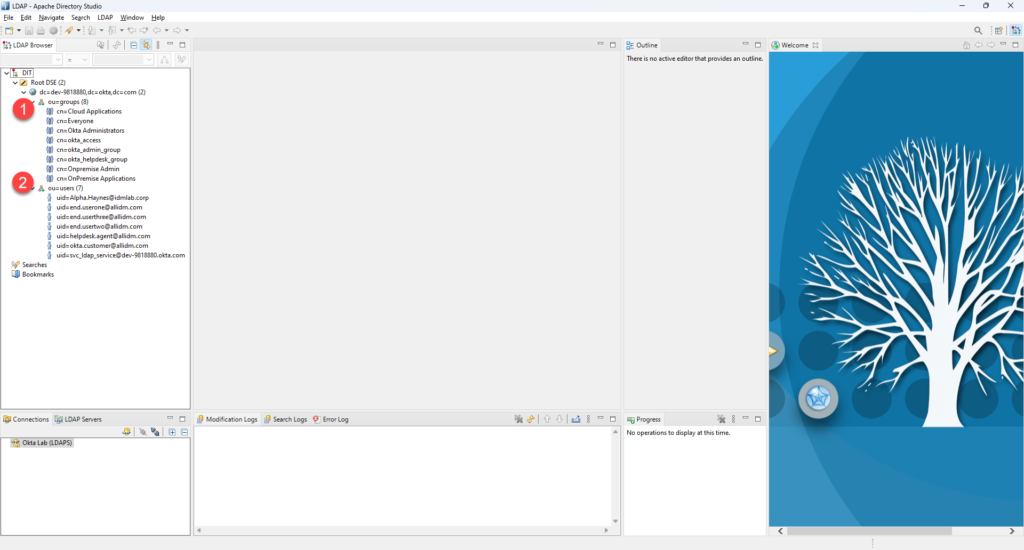
Lightweight Directory Access Protocol (LDAP) is a well-known protocol for directory services; with the Okta LDAP interface, you can browse your Okta tenant using a Client like Apache Directory Studio, following are the necessary steps to enable the Okta Instance and connect with LDAP client.
To complete the steps you will need super admin permissions and a service account.
- Access your Okta tenant as a super ad.min
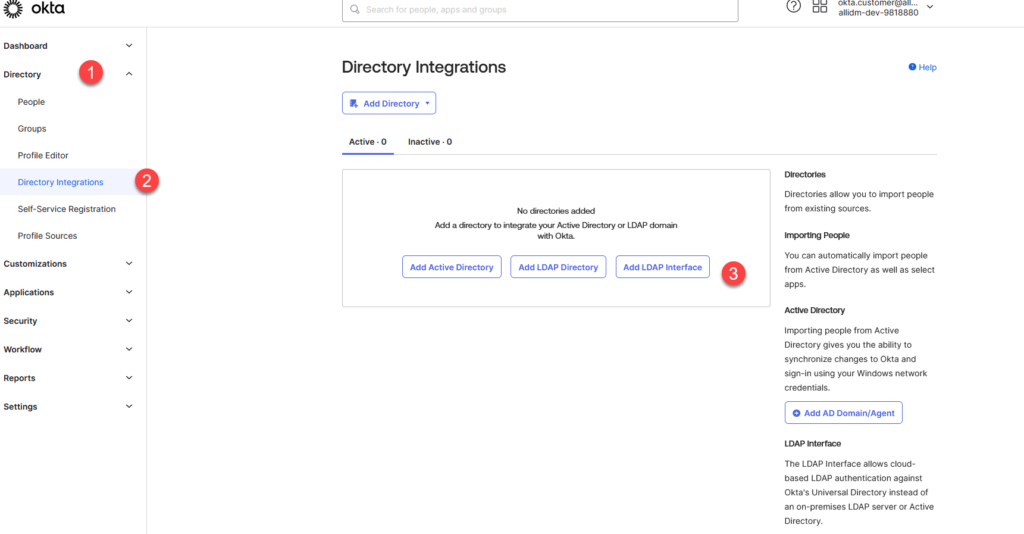
- In the Admin console, go to Directory > Directory Integration
- Click the Add LDAP Interface Button
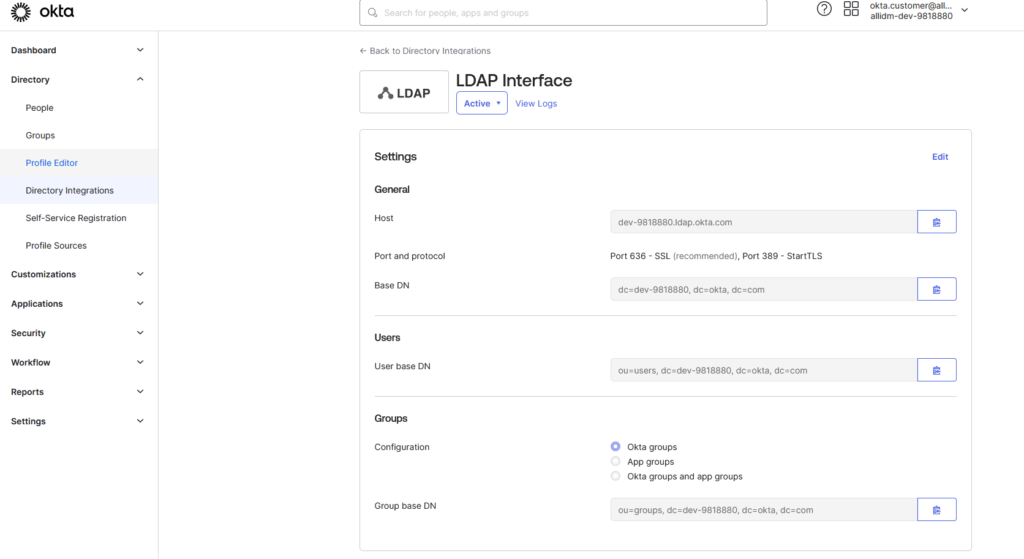
4. Okta will activate the LDAP interface in your tenant. On this screen, Okta displays the Base DN, User base DN, and Group Base DN.
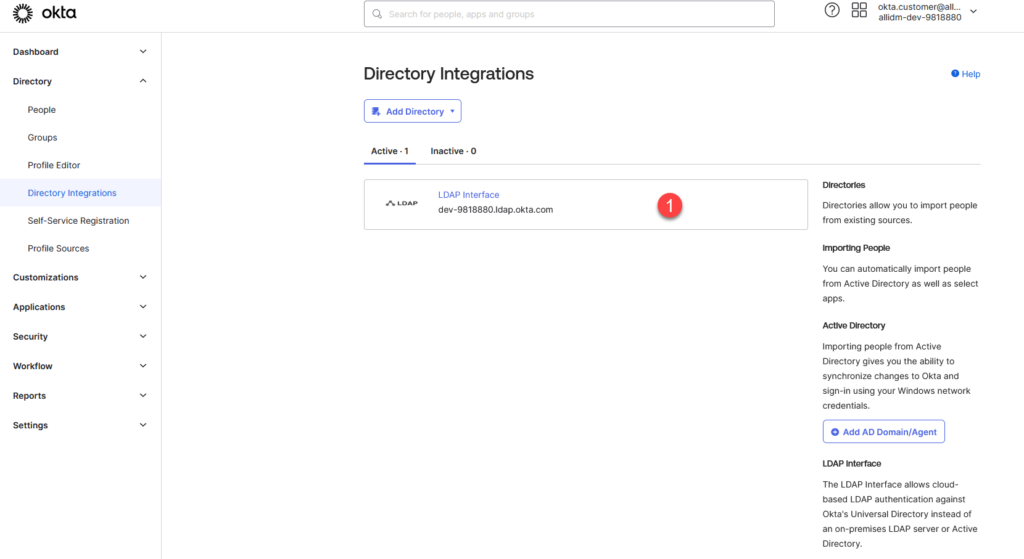
5. Okta Directory Integration now will display the LDAP Interface Active
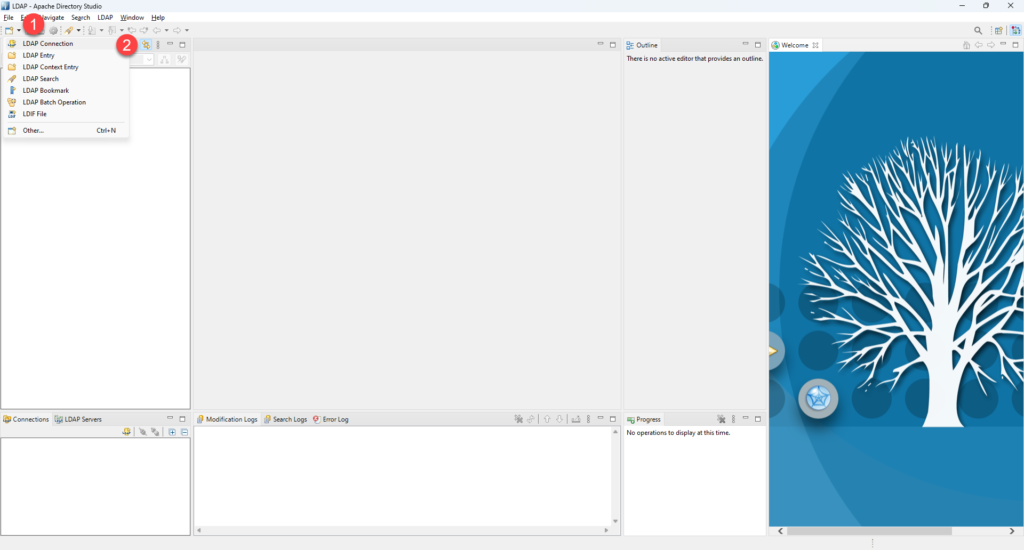
6. Open Apache Directory, and click LDAP Connection
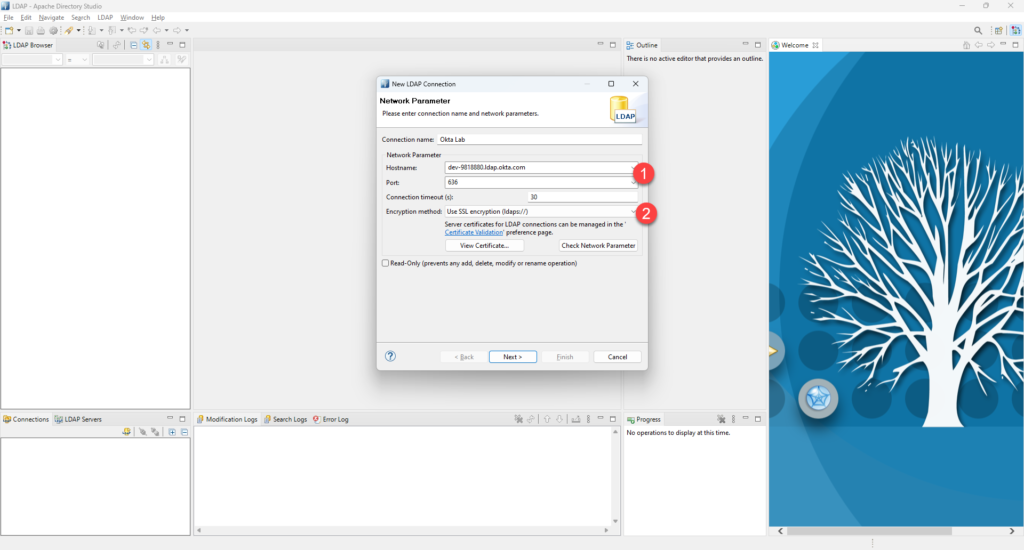
7. Complete the Hostname, change the port to 636, and change the encryption. Click Next.
8. Now complete the Authentication parameters. Select the Simple Authentication Method and use a service account with read-only permissions.
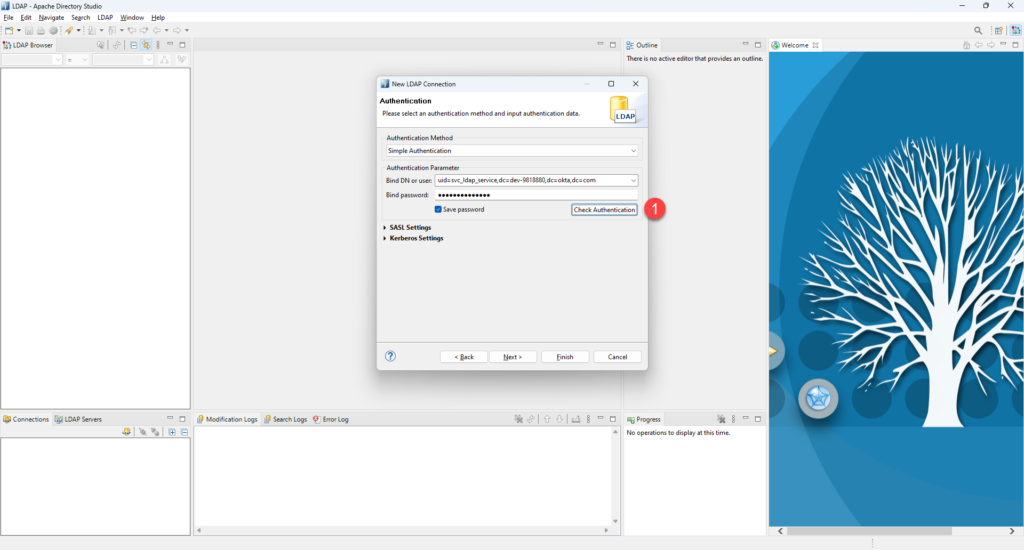
9. Click the Check Authentication button to verify your credentials works. Click OK
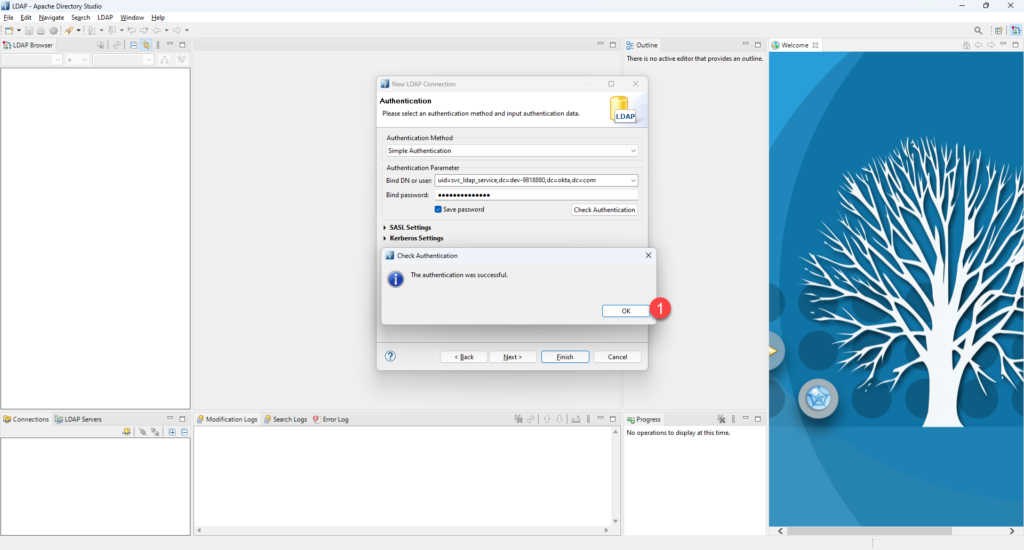
10. If your connection in the previous screen was successful connected to your Okta Tenant using the Apache Directory Studio Client. You can now expand the groups onavigateU to navigate the Okta data.
